Team Manager - Courses
COURSES
COURSE PUBLISHING OVERVIEW
Only Members with specific admin-level privileges can publish and manage course content. Courses loaded in to Team Manager must be published as Tin Can (xAPI) packages. This is a publishing option from course authoring software that allows the course to speak the same “language” as Team Manager and pass valuable information, such as answers, scores, and completion data from your course back to Team Manager.
PlayerLync does not endorse or recommend one authoring software over another. There are many course publishing platforms available. Some popular options include Articulate Storyline, Articulate Rise 360, and Adobe Captivate.
As an example, in Articulate Storyline v3 you will perform the following steps to output to Tin Can...
- On the main toolbar, go to the Home tab, then Publish. You’ll see the Publish screen.
- Select LMS on the left
- Select Tin Can API as the LMS Output Option
- Click Publish
- When the course is done publishing, zip the file
If using content created for you from a third party, ask them to provide you files as a Tin Can package.
Important Note: PlayerLync does not support SCORM courses as the SCORM standard was replaced by xAPI in 2009.
CREATING AND ASSIGNING A NEW COURSE
- From the Courses tab, click on Add Course
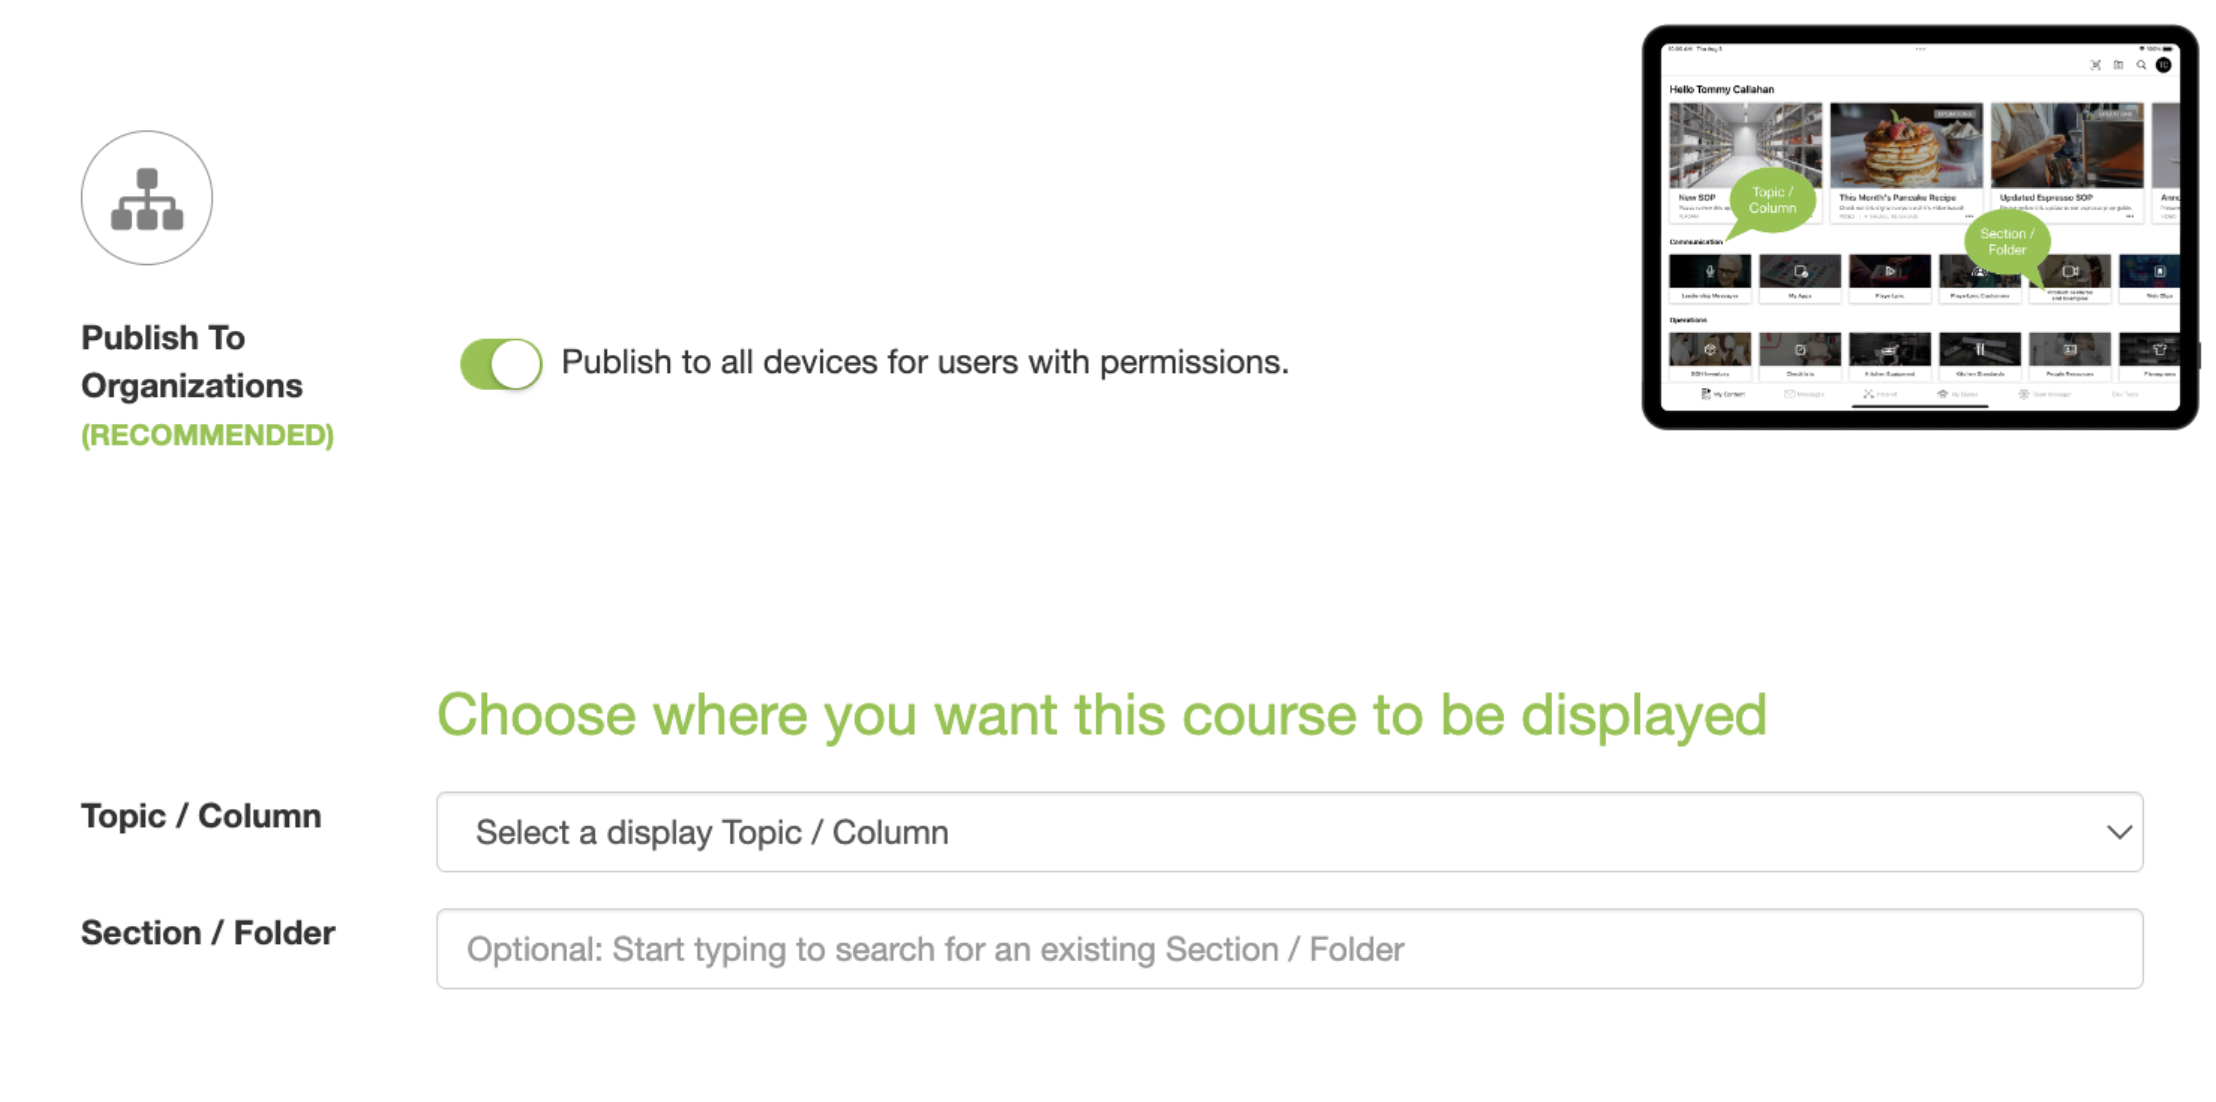
- Select whether you intend to publish the course to an organization, or to groups
- Select the course
- Click upload and wait for it to finish
You now will be taken to a series of tabs now to finish setting up your course...
Note: You may notice some tabs do not appear immediately. This is intentional. They will appear as you go through the steps.
Tab 1: Course Settings
1. Give your course a title (by default it uses the title built within the course)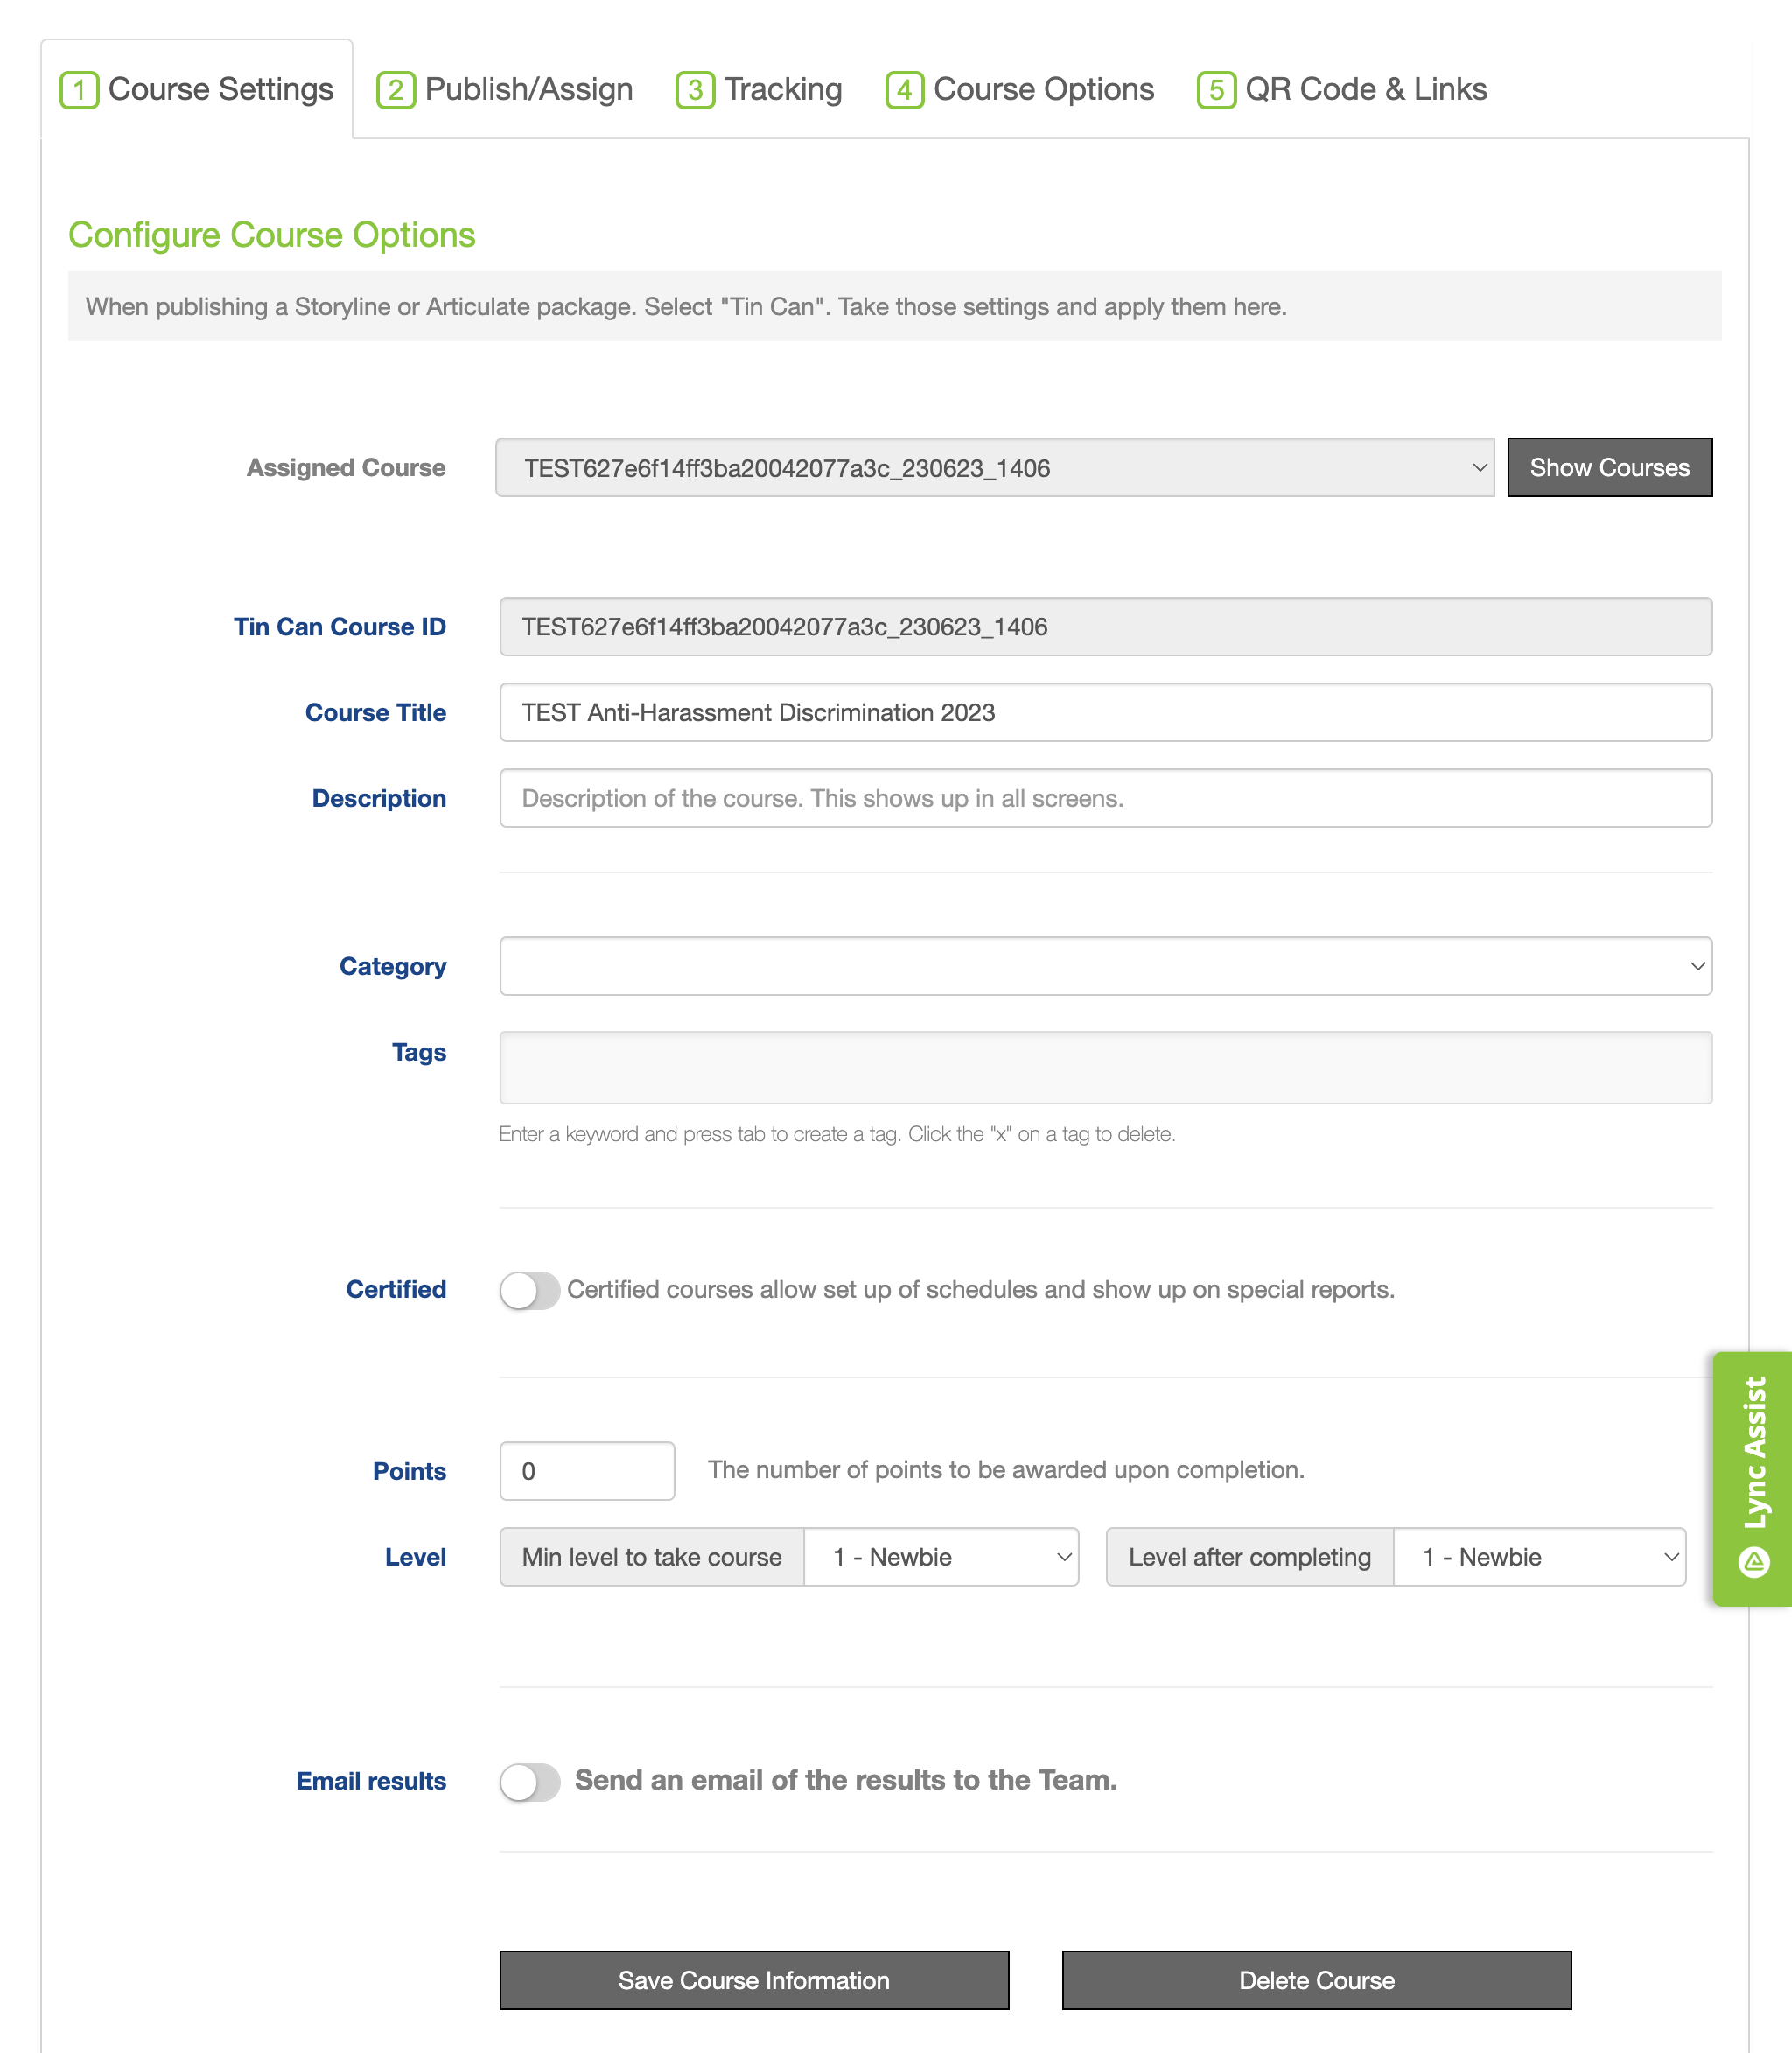
2. Enter a description to tell your course-takers what the course is about
3. Select a category from the drop-down (categories are defined under Settings in the top menu)
4. Enter any relevant tags
5. If the course is a certification and you want to include the results in specific reports, select this option.
6. If you plan to use gamification for this course, enter the total number of points the course is worth once completed
7. Select gamification levels
8. Lastly, enable the slider to email results to the Team email address (defined under Settings--> Team above)
9. Click Save before moving on to other tabs.
Tab 2: Publish / Assign
1. Select the Organization, Column / Row, and Section you wish to publish the course to. Also decide if you'd like the course to show up on the Content tab vs. only in the Training Queue.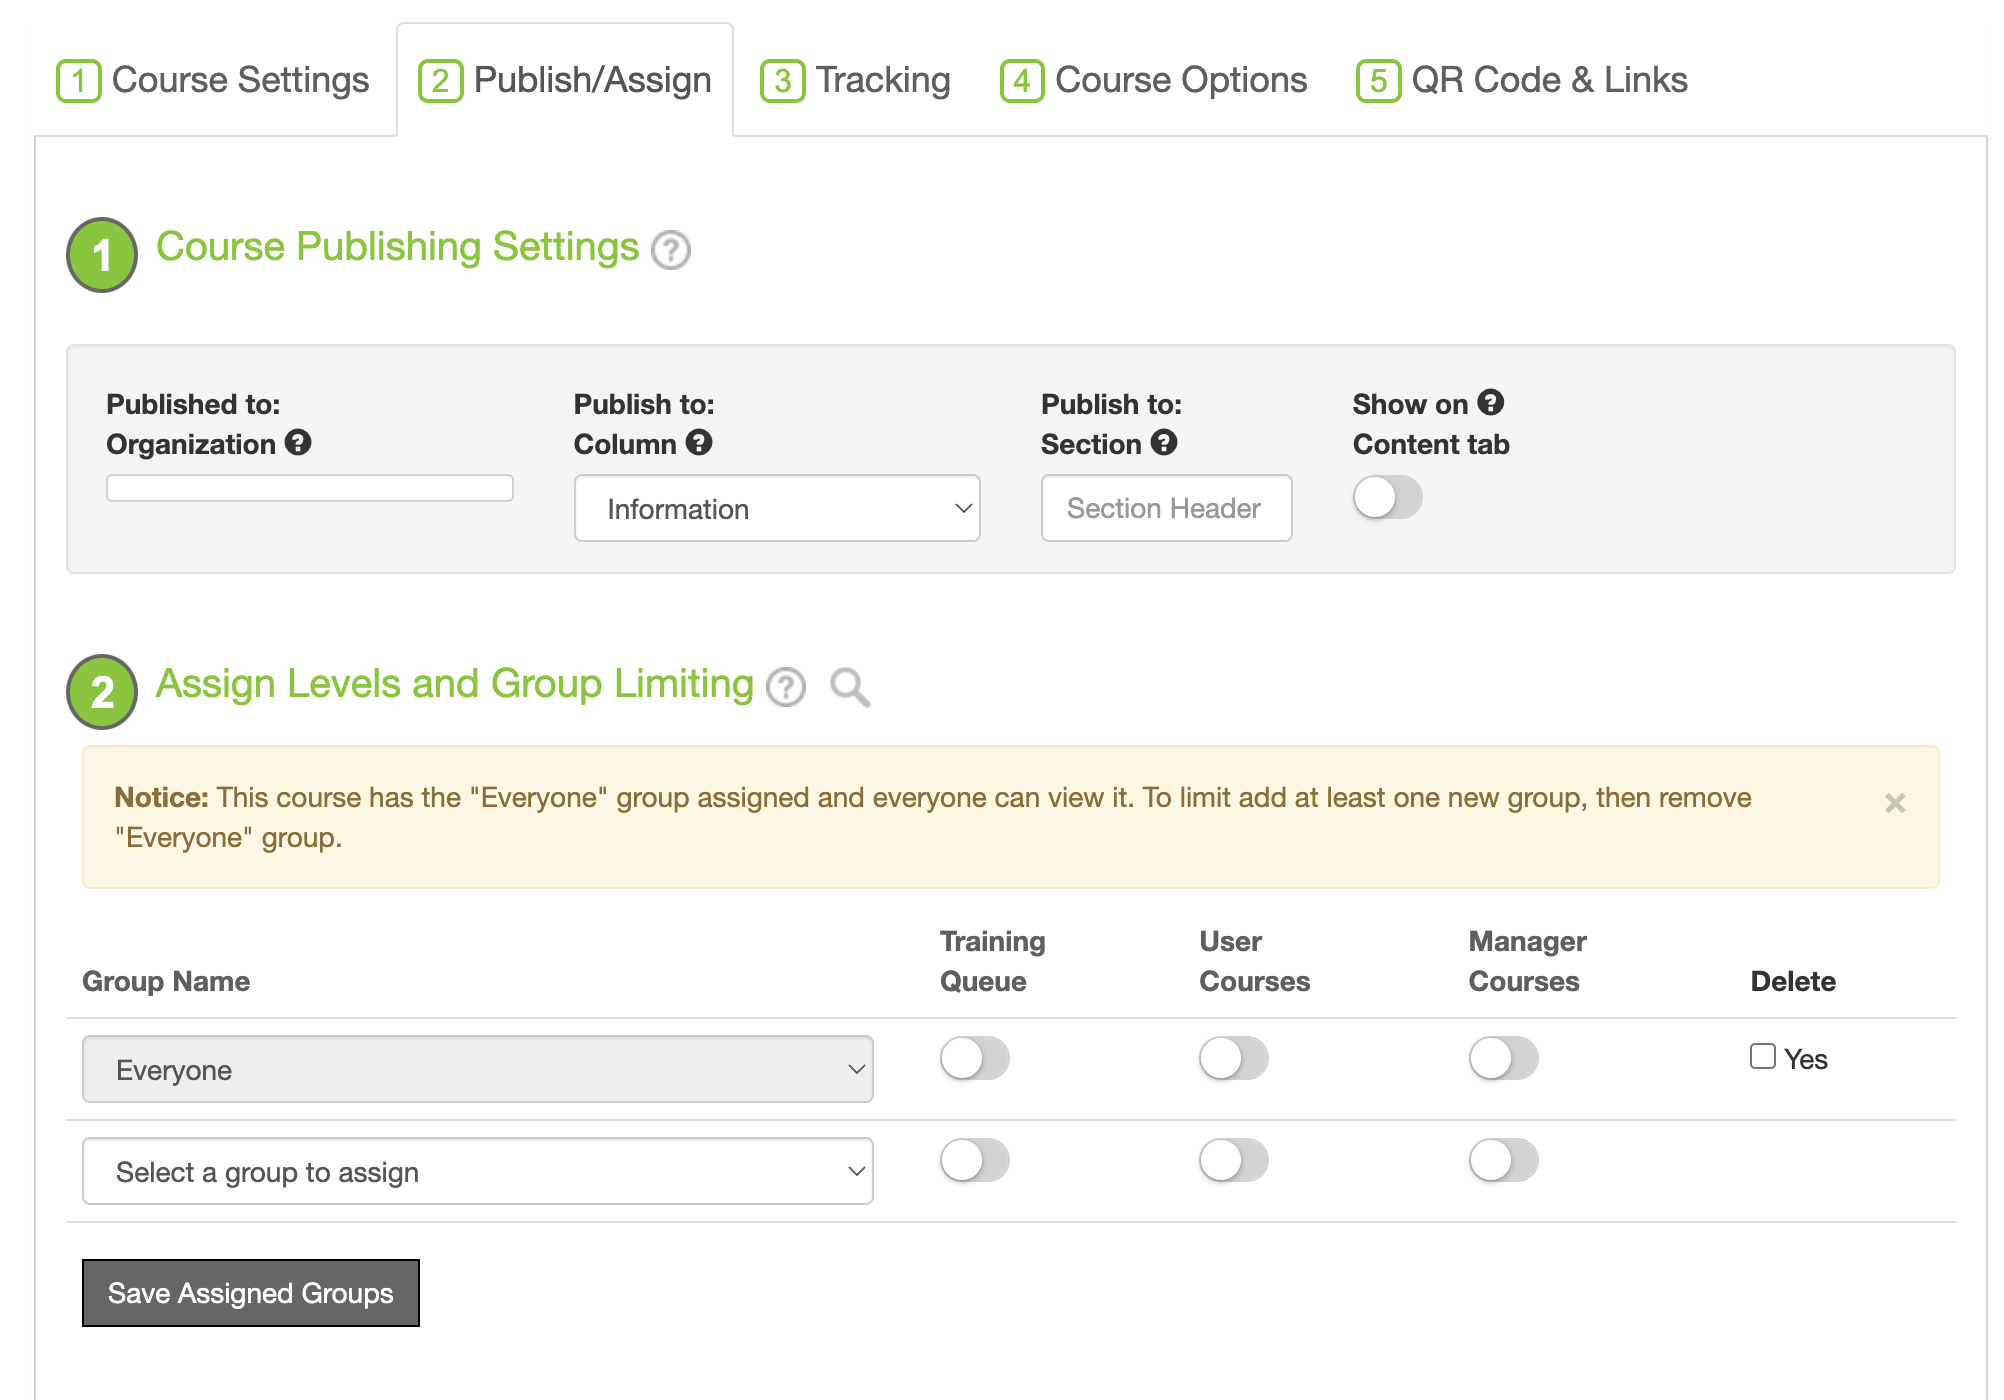
2. Select the groups where you wish to publish the course and how
Training Queue - Toggle this option when you want to use this course in the Training Queue. When you select this option, you’ll still choose a column/row above for the course in the PlayerLync app, but the course will not appear in that column/row unless the Show on Content Tab option is selected in step 1.
User Courses - Toggle this option to have the course show up in the Courses menu of TM for the end-user if they login to the web.
Manager Courses - Toggle this option to have the course show up in the Courses menu of TM for managers if they login to the web.
Note: The Everyone group is automatically added to every piece of content, including forms and courses. This is a system function and can only be removed if another group is added first.
No matter which option is selected, the Tin Can course will be downloaded to the device and not "streamed". This minimizes buffering issues and allows the member to access content offline.
Tab 3: Tracking
Setup tracking for a birds-eye view of the course completion and scoring for all members who took it. (More about tracking here)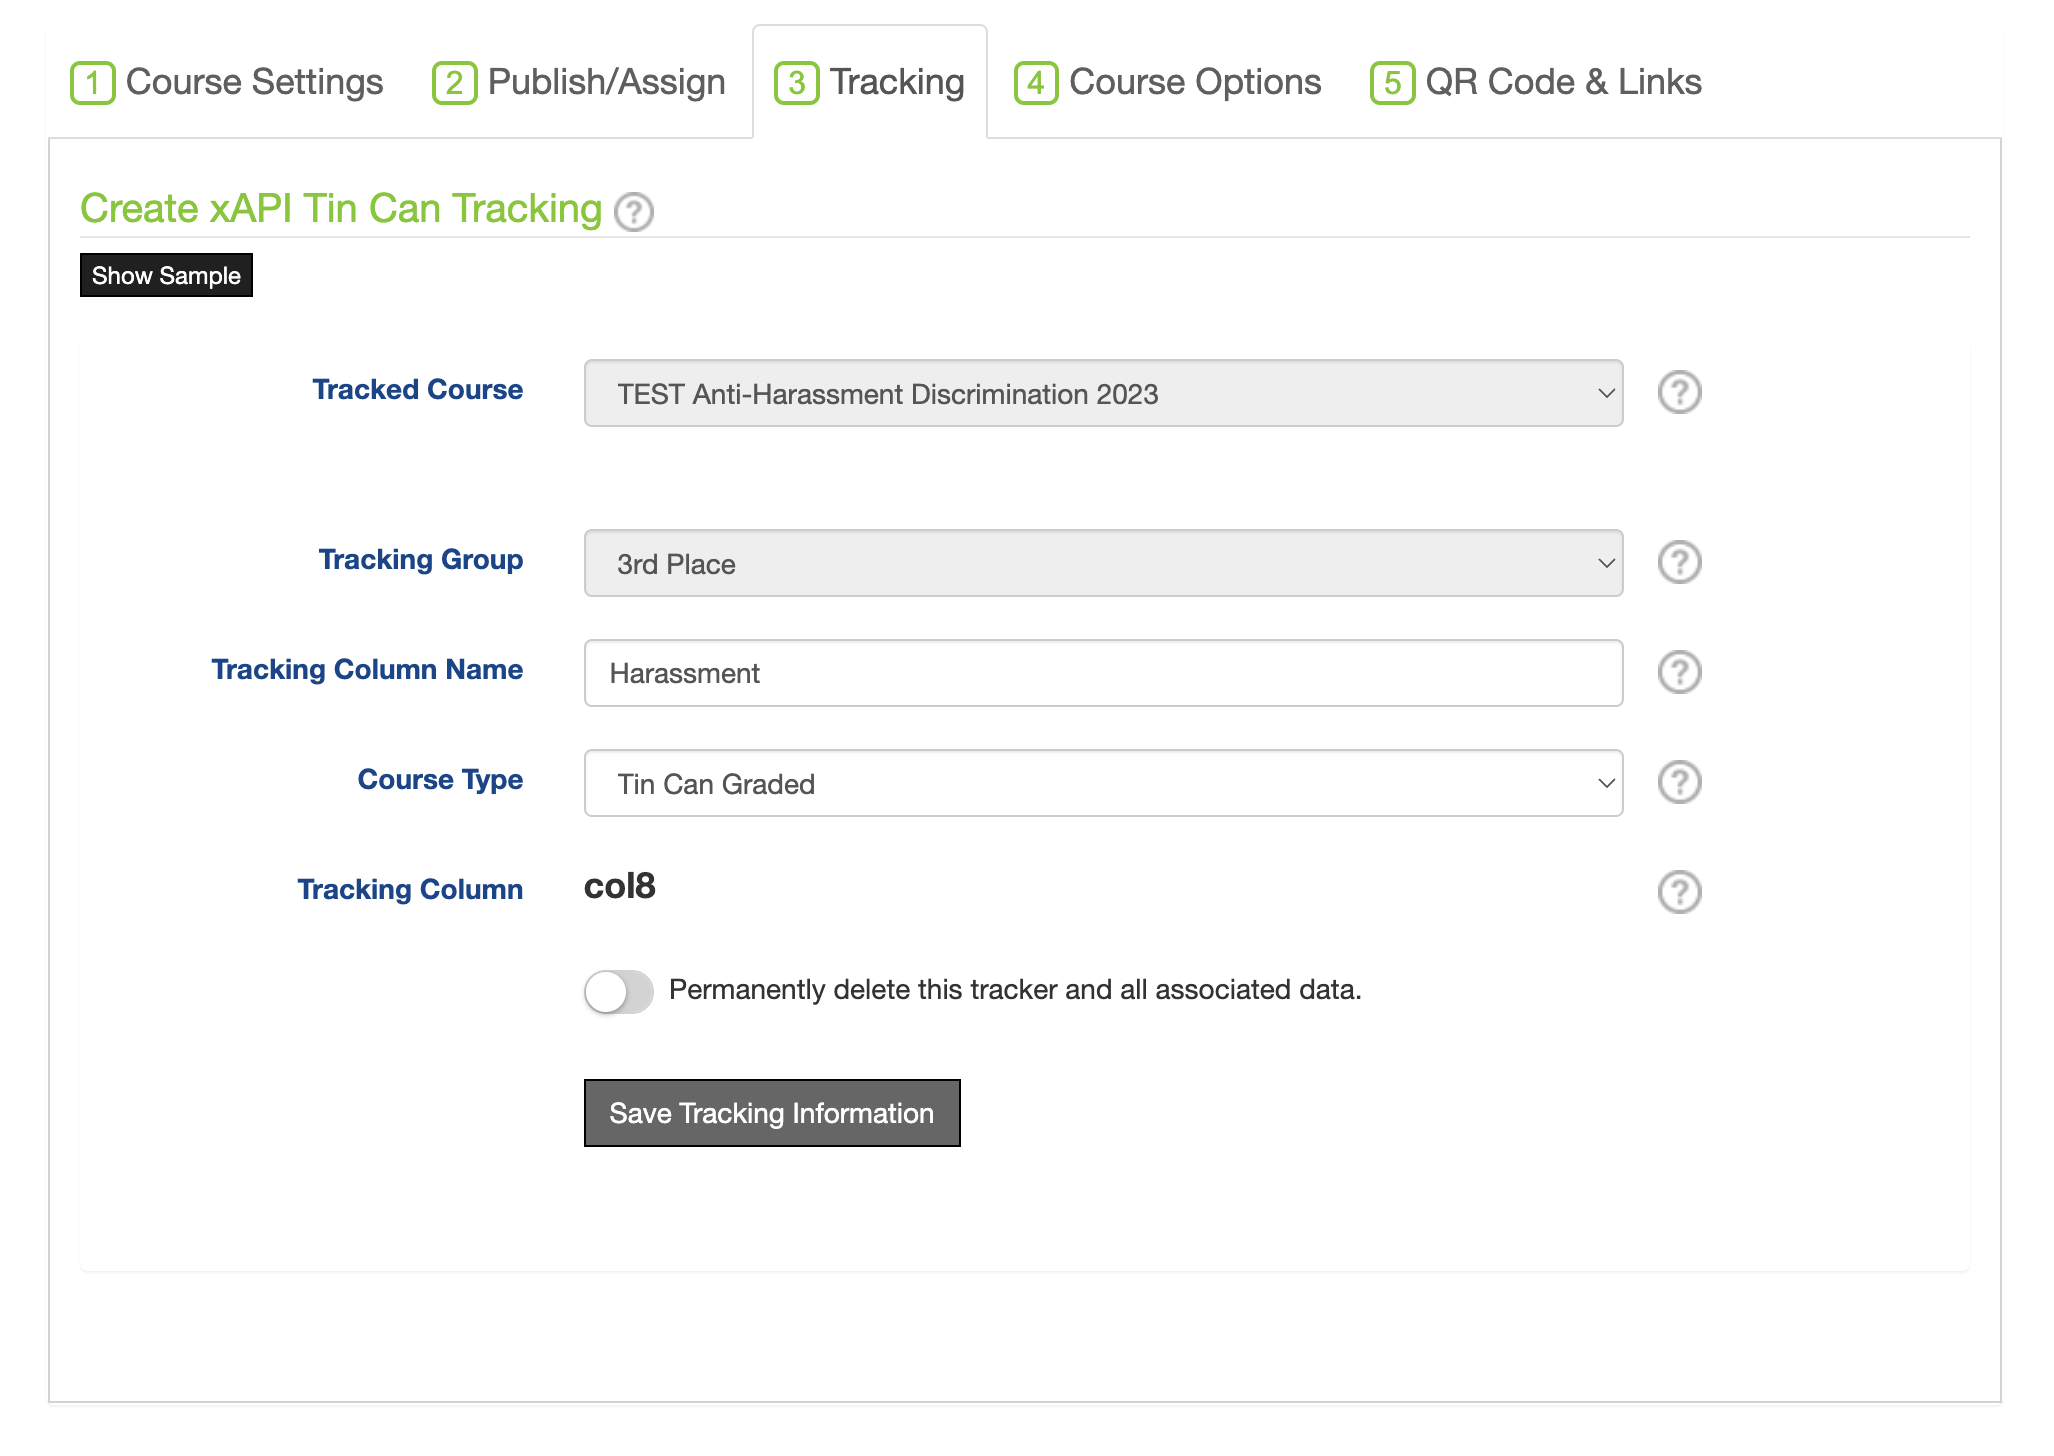
1. Select a tracking group (You must setup tracking groups before they will appear here) Once a tracking group is selected, more options will appear.
2. Give the tracked course a name / title
3. Choose if the course type is graded or completed
4. Finally, select an available column to show the course tracking information
5. Click Save and move to the next tab
Tab 4: Course Options
These are optional settings to control further details about your course.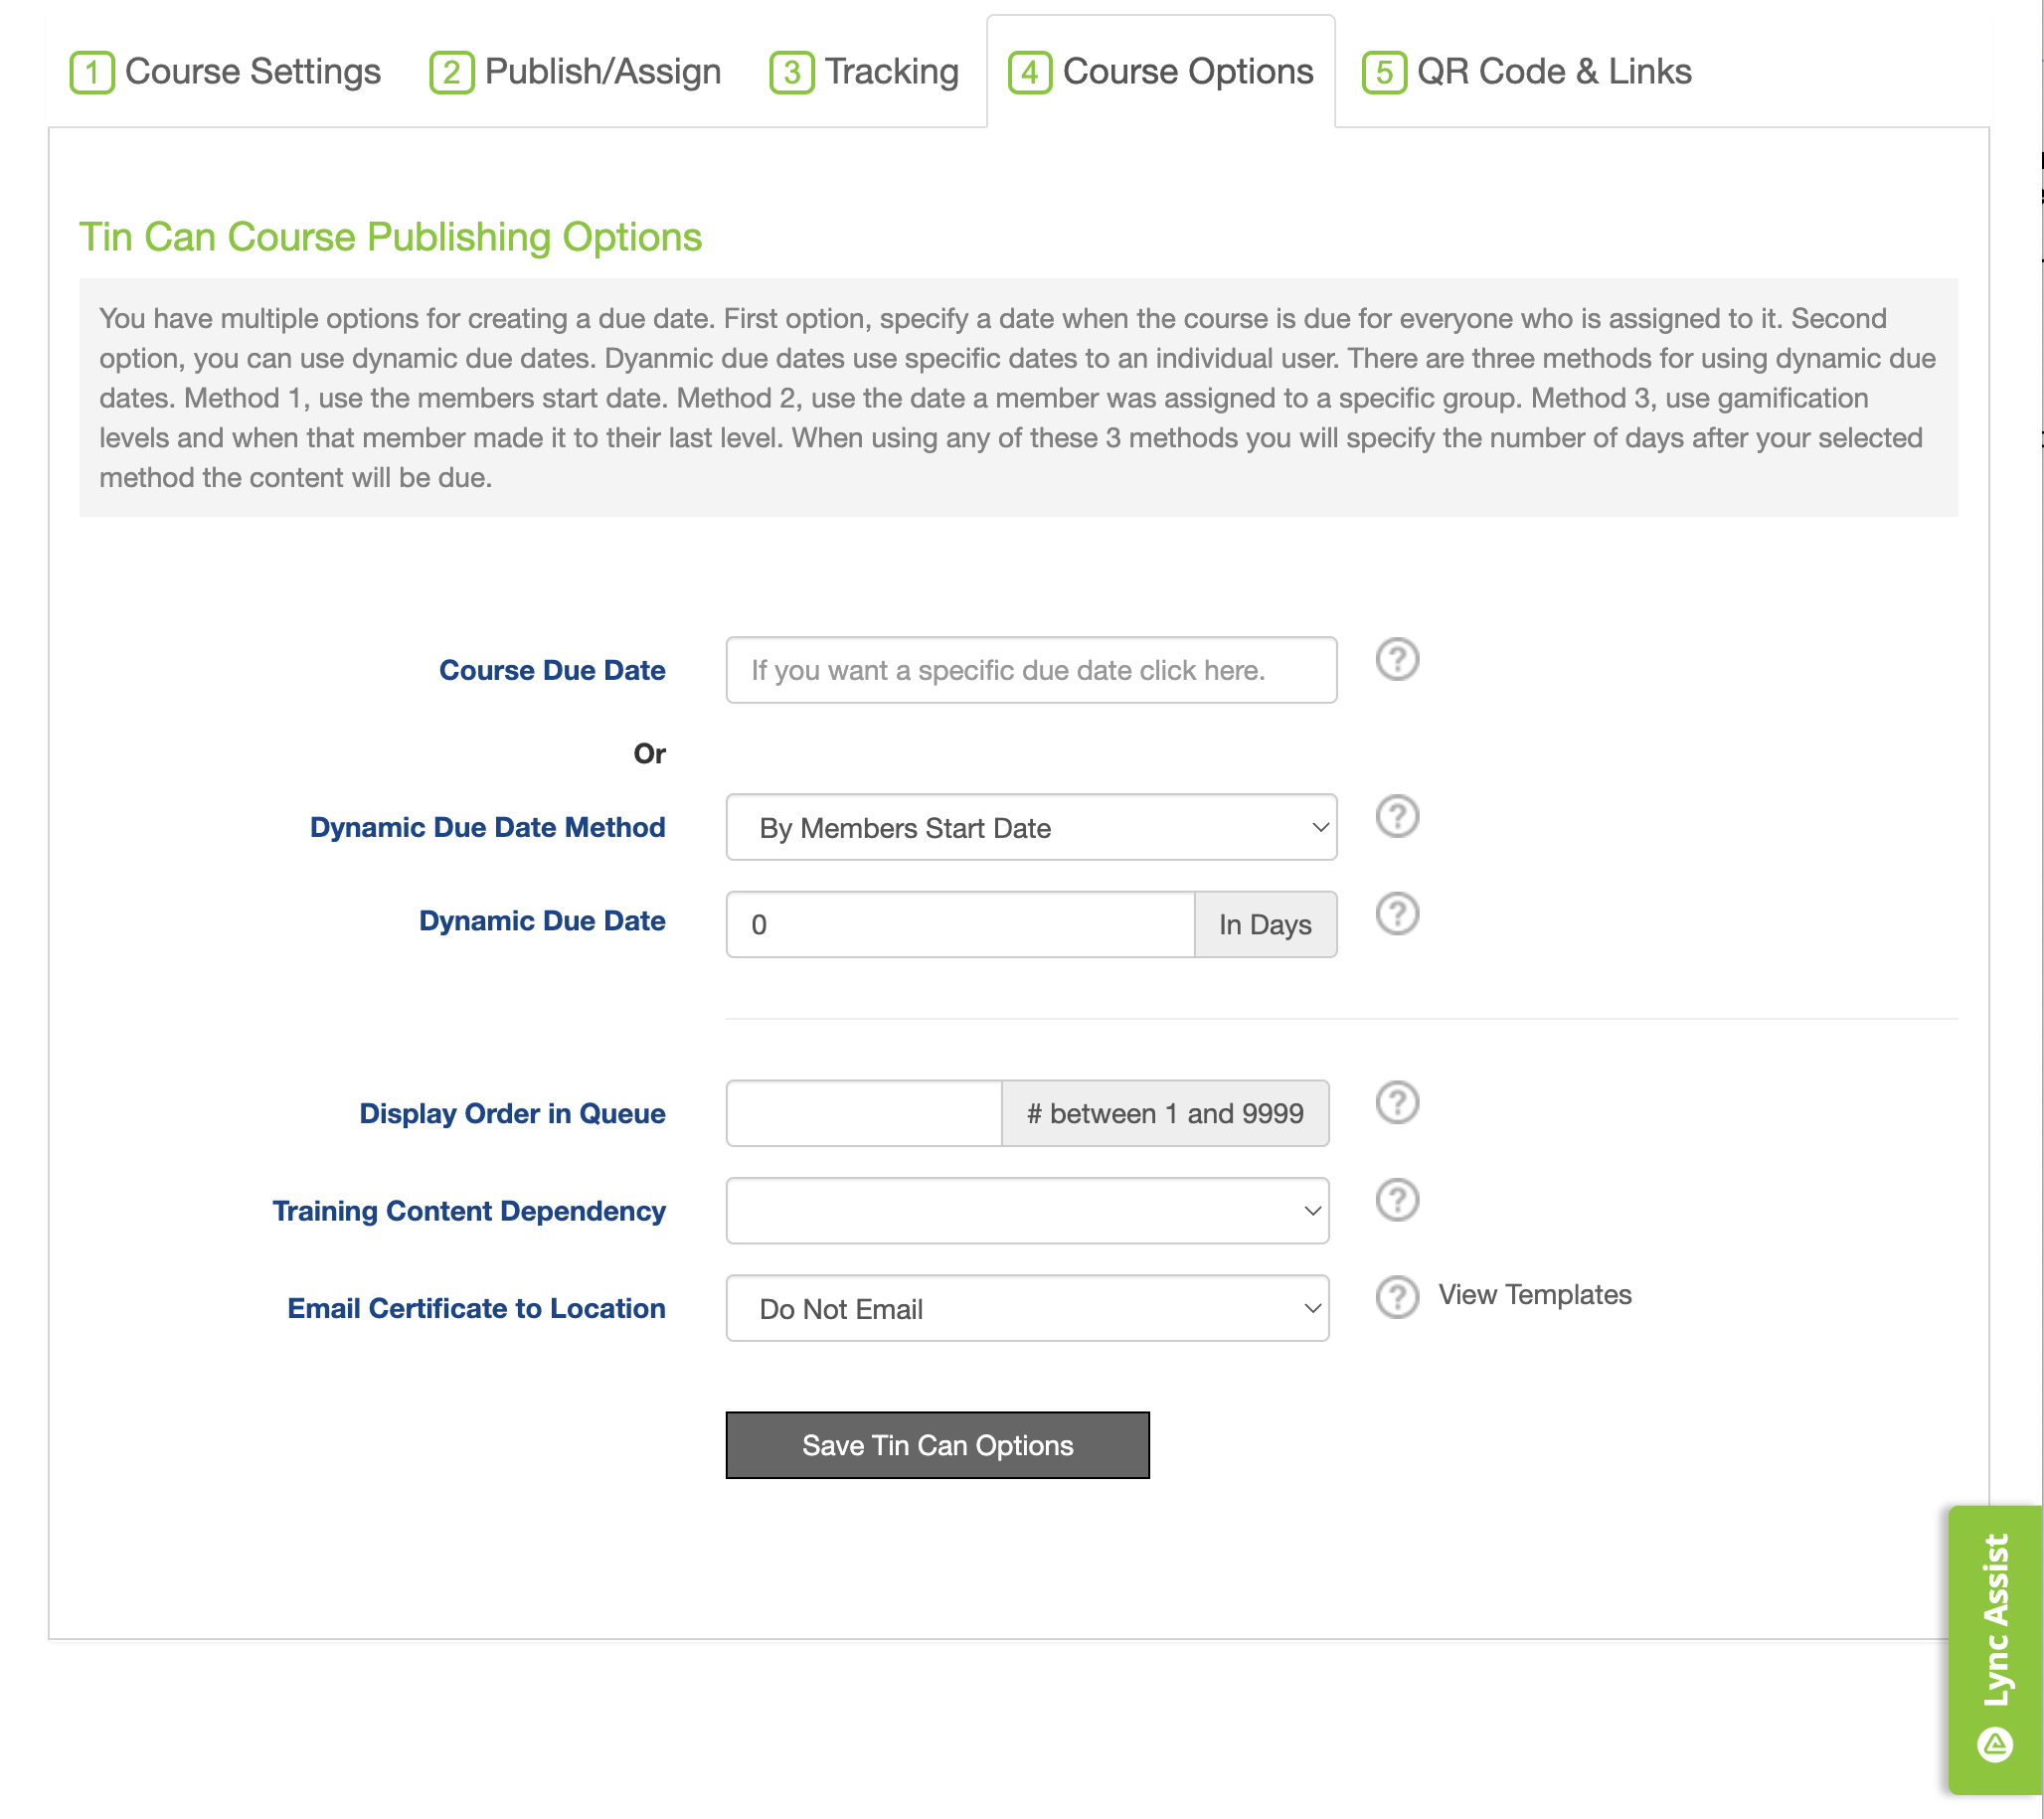
1. Enter a course due date if you'd like to assign it by actual date or dynamically based on the member's start date (set on their member profile)
2. Select a display order for the queue
3. If your course has a dependency that must be completed prior to this course, select that course from the drop-down
4. If you would like a successful completion to result in the member receiving a certificate, select one from the drop-down or use the link to view available templates. Templates can also be crafted and edited from the Settings->Certificates menu.
5. Click save and move to the next tab
Tab 5: QR Code & Links
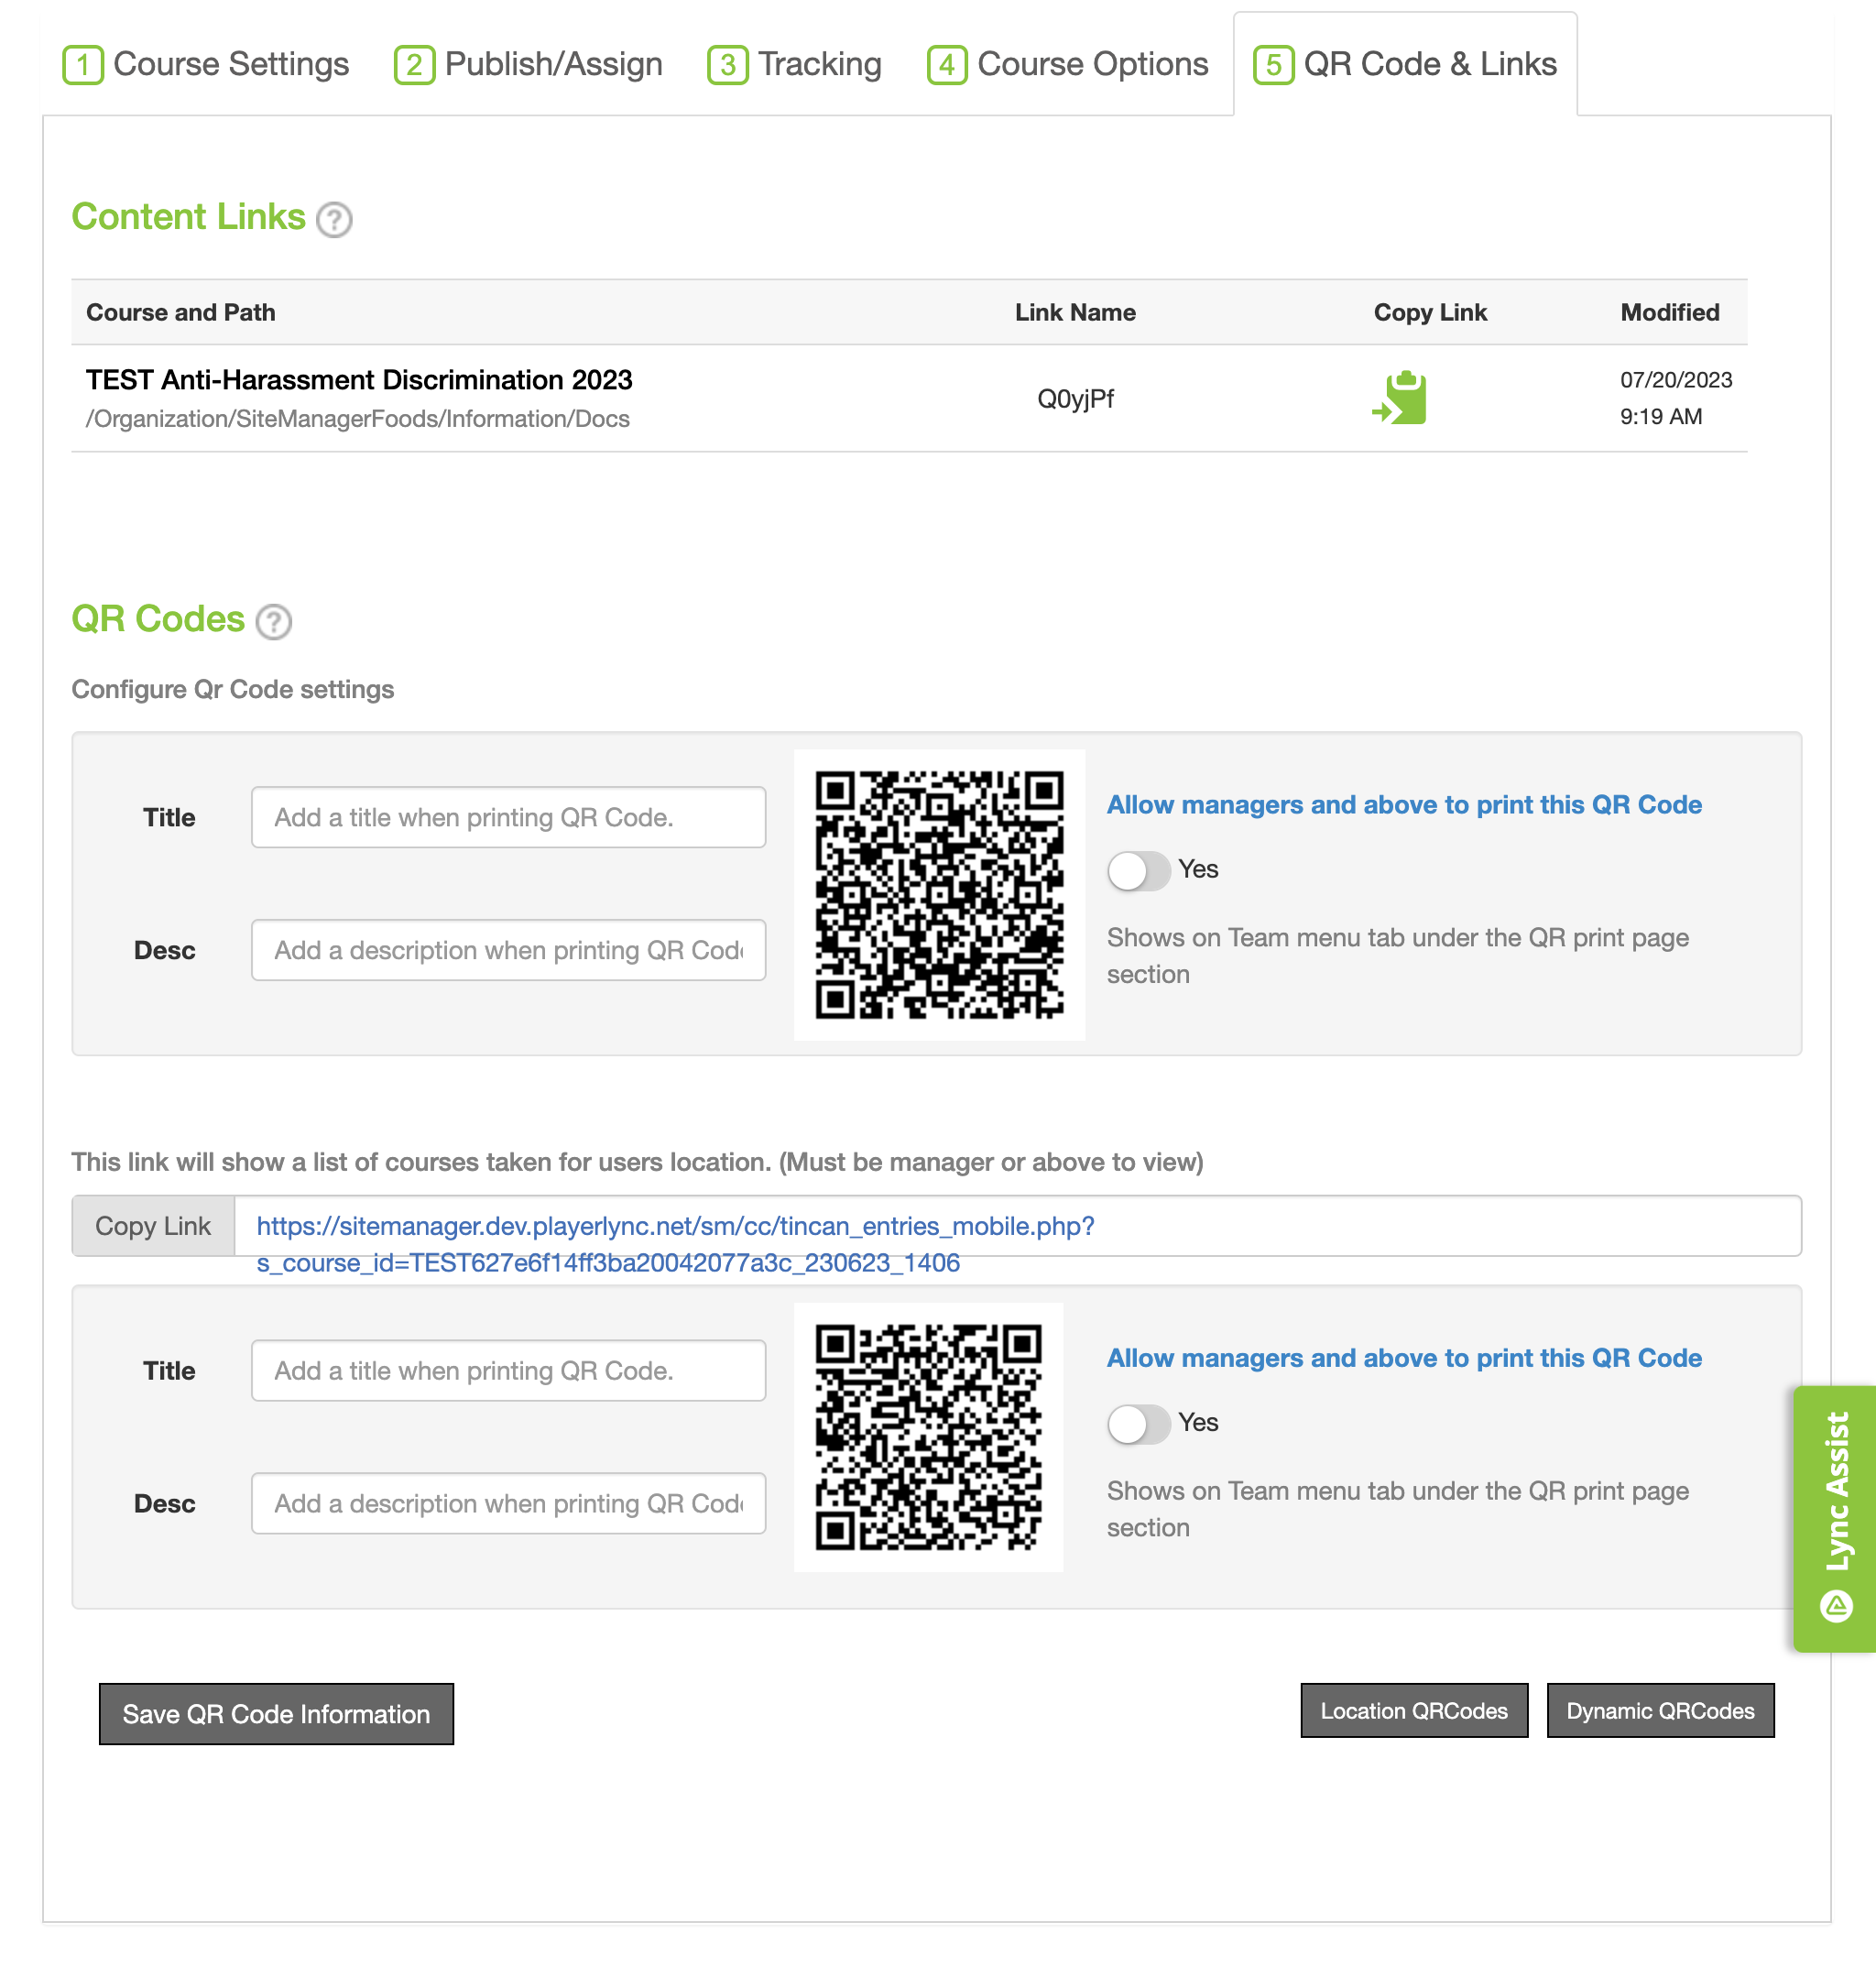
This are provides a convenient way to get the Content Link for the course as well as setup QR codes to be used for accessing the course. For more information about QR codes, click here.
Updating an Existing Course
If you would like to adjust a course that has already been published and want to retain the tracking information previously setup, you will need to ensure course name and course ID remain the same as the original. This will update the course, but keep the full history of tracking. Further, this will allow for additional/new tracking to be added. If the course name or ID change when you upload a new version of the course, tracking in PlayerLync will stop working as expected.
DeleteOn this page
