Admin - Members - Adding & Managing

Written by Drew Holliday
Updated at October 30th, 2023
MEMBERS - ADDING & MANAGING
Members are users of the PlayerLync platform. When you create a new member, you’re creating a new account and setting up information including username, password, which add-on modules they’ll have access to, types of content, etc.
A member may be an individual person (Tyler Durden) or be set up as a shared login (Store001) depending on how you have licensed the PlayerLync software. Please see your Customer Success Manager for questions about licensing.
ADDING A NEW MEMBER
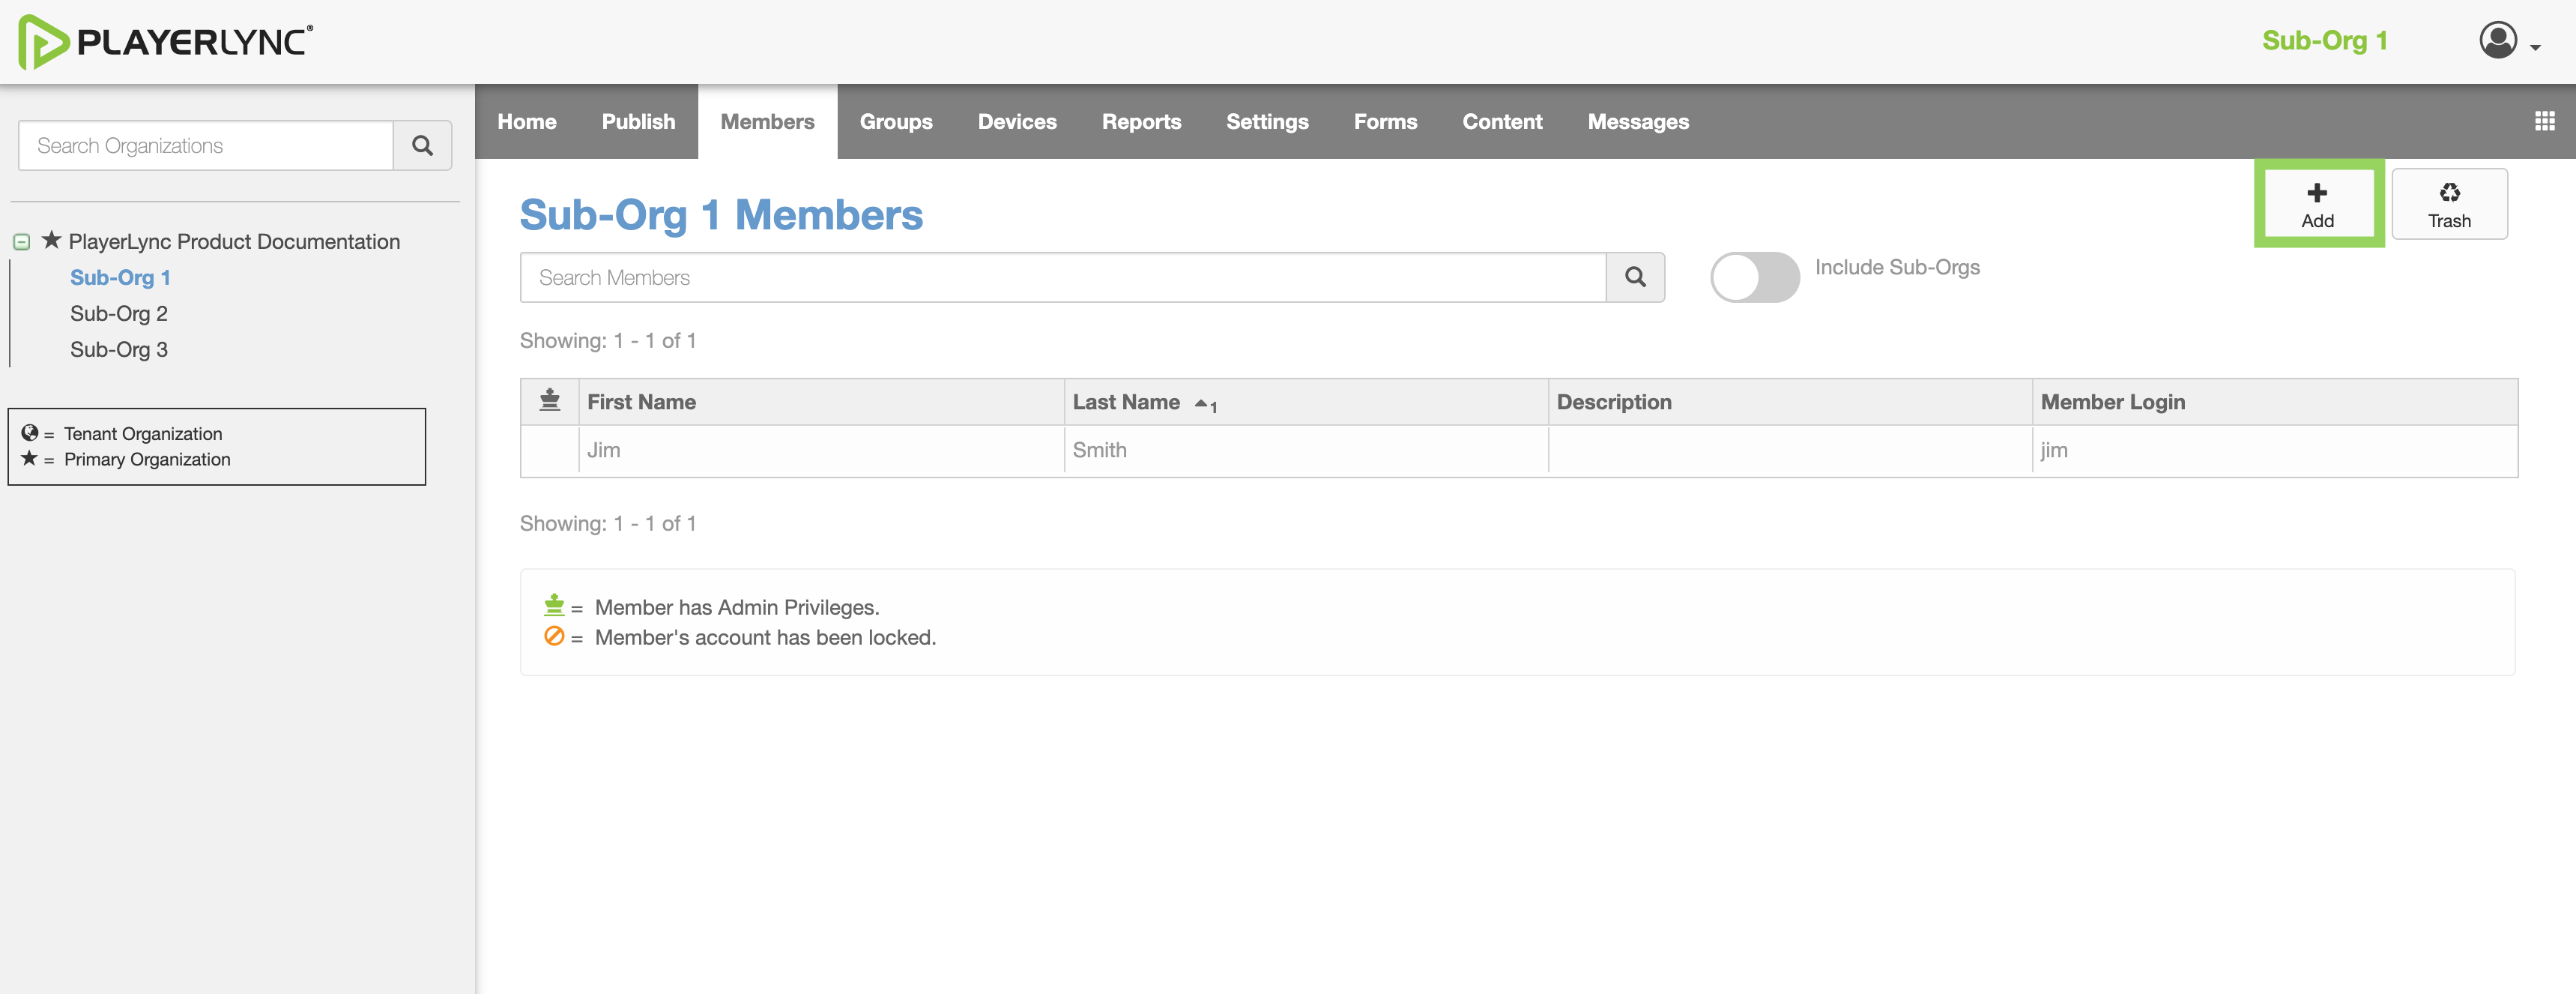
- Select the org level from which you want to create a member.
Important Notes:- If you’re creating an Administrative member, they can be given access to manage the devices and members that are tied to this level and below without any additional access provided. See the article on Admin Privileges
-
If you’re using the PlayerLync Messaging module, then members will be able to message others at their same org level and below.
- If you’re creating an Administrative member, they can be given access to manage the devices and members that are tied to this level and below without any additional access provided. See the article on Admin Privileges
- Click the Members tab. You will now see the list of members that are tied to that level.
- Click the + Add button.
- You will now see the New Member screen. Enter the required info – First Name, Last Name, Member Login, Password/Confirm Password and any additional details you'd like to retain for this member.
Important Notes:
-
It is recommended to use a company standard for setting up the member login, as this is a unique database field and cannot be changed once saved
-
If you misspell or mistype a member login and have already saved it, you will need to delete that member and start again as it is the only field not editable once saved. The quickest way to do this is to clone the member and adjust the details before saving.
-
Description – This field will be visible to members in the address book when using PlayerLync Messaging. It is recommended to use this field for job titles or other such information if at all, and not for anything administrative or confidential.
-
Mobile phone – If your company subscribes to the PlayerLync Messaging module and it is enabled for this member, then entering their cell number will allow them to receive a copy of messages sent to them through PlayerLync Messaging (up to 140 characters) via SMS. Note that standard data and messaging rates apply through their cell carrier.
-
It is recommended to use a company standard for setting up the member login, as this is a unique database field and cannot be changed once saved
- If you wish to set this member as an Administrator, please reference the article: Tiered Administration
- Click Add when done. This will take you back to the Members list and the account will now be available.
MODIFYING SETTINGS ON A NEW MEMBER
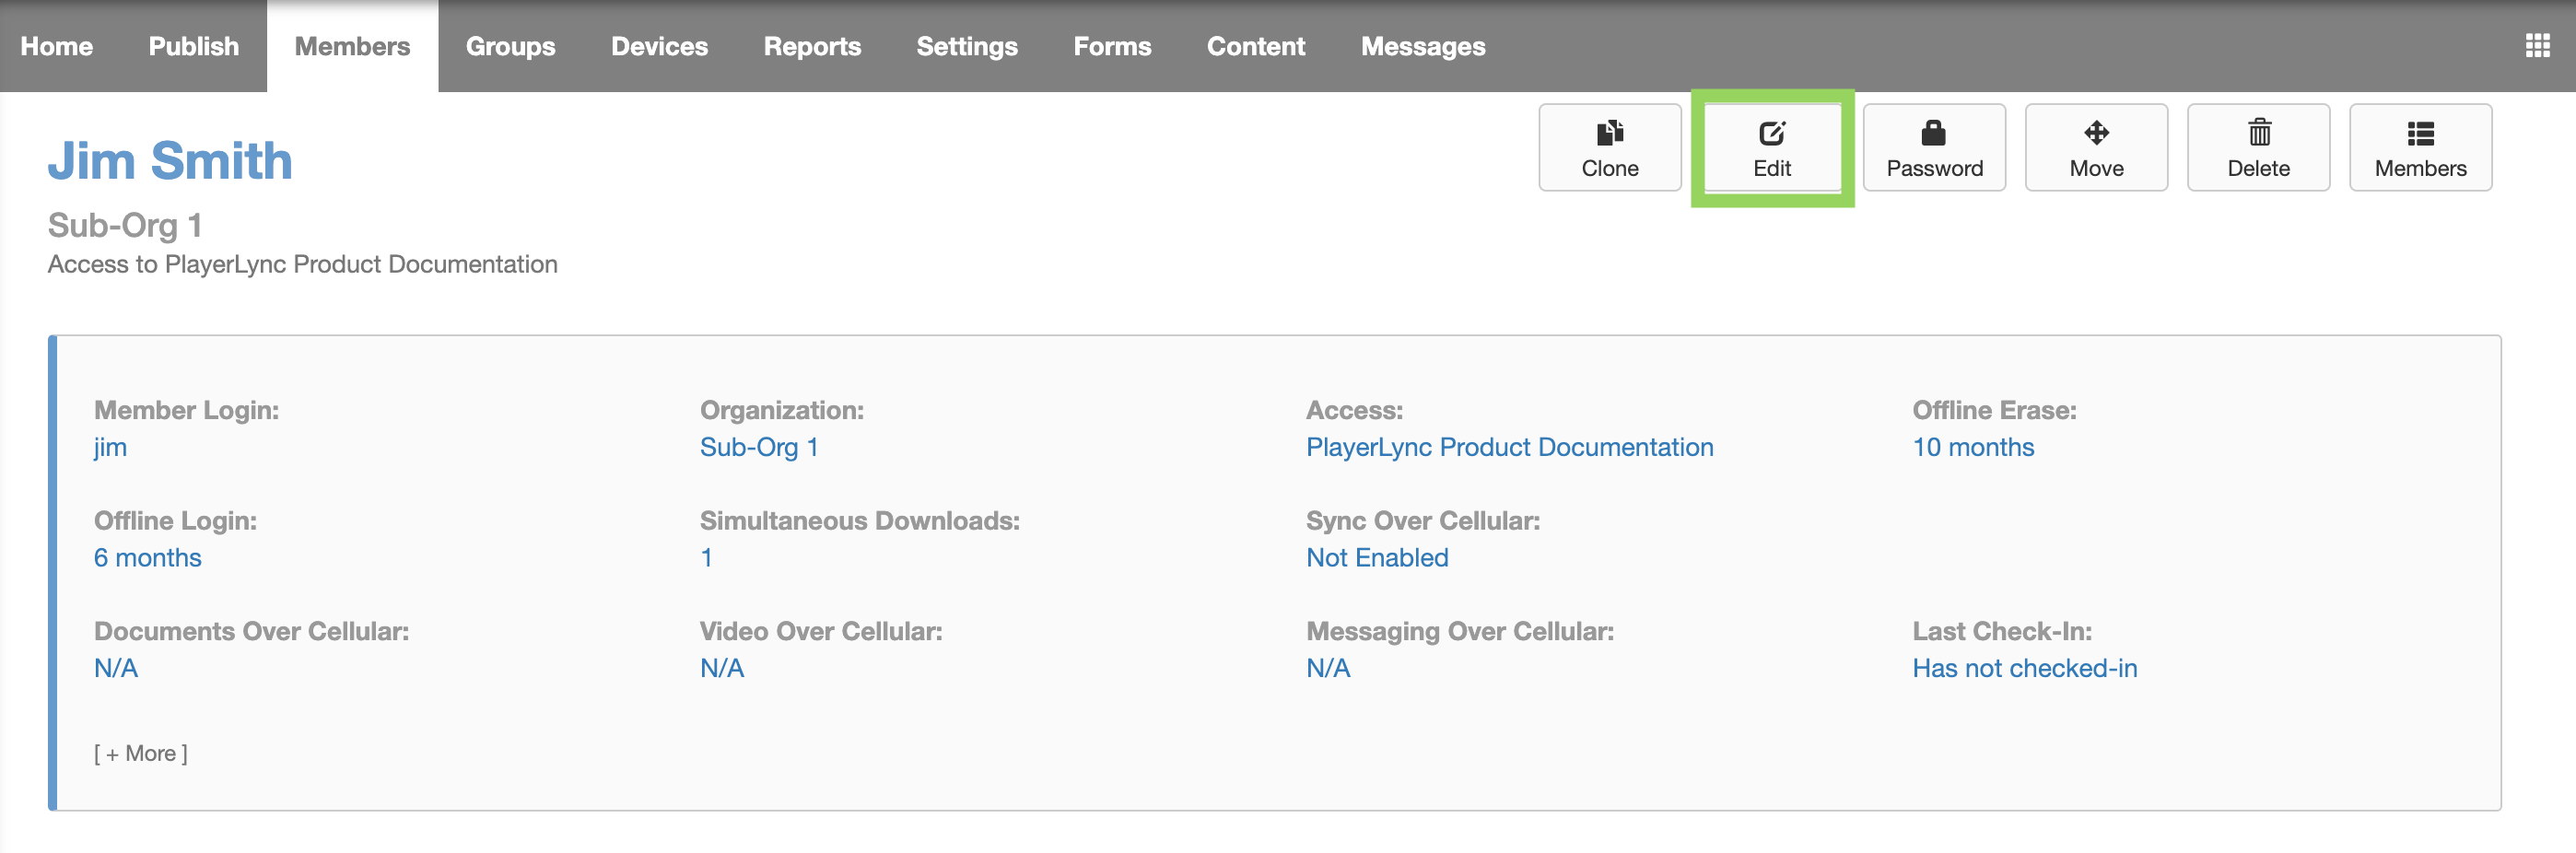
- To make adjustments to member access levels (such as which modules they have access to), click on the name of the member you just created.
- You will see all the current settings for that member. Click the Edit button.
- Make any changes needed. The current settings under App Settings, Cellular Settings, and Add-On Features can be set up to default for the entire organization or sub-organization, so once you create a new member you can come in and just make any minor adjustments.
To learn more, review the article: Member Defaults
MANAGING MEMBERS
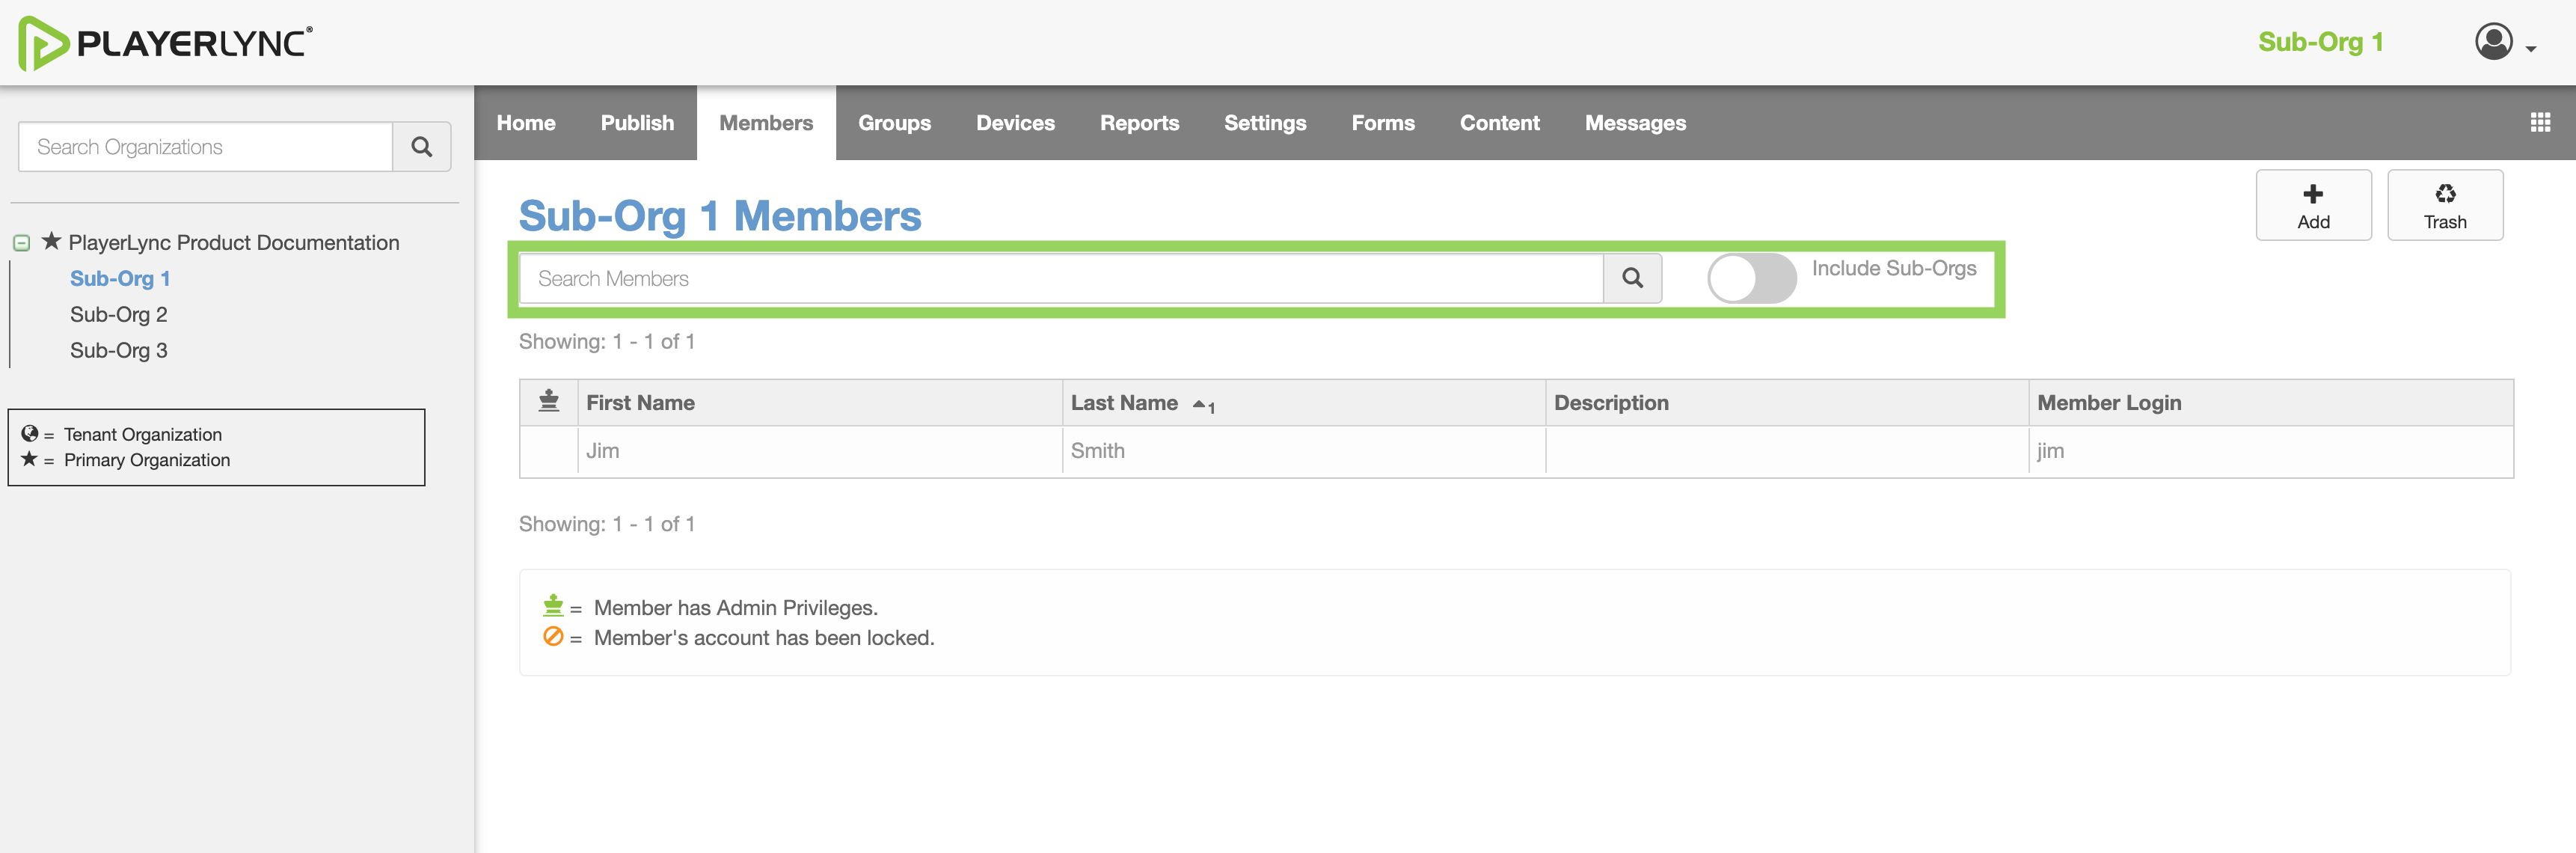
- Select the organization level from the Org Tree where the Member is located.
- From the Members tab, locate the member to manage. There are a few ways to quickly locate a Member...
- Search: Use this field to search against any part of the members name or login information.
- Include Sub-Orgs: To include sub-organizations in the list of available members.
-
Column Headings: Click column headings in the member table to sort ascending or descending.
- Click on the name of the Member. You will see all the member information displayed with a number of buttons along the top to manage the member.
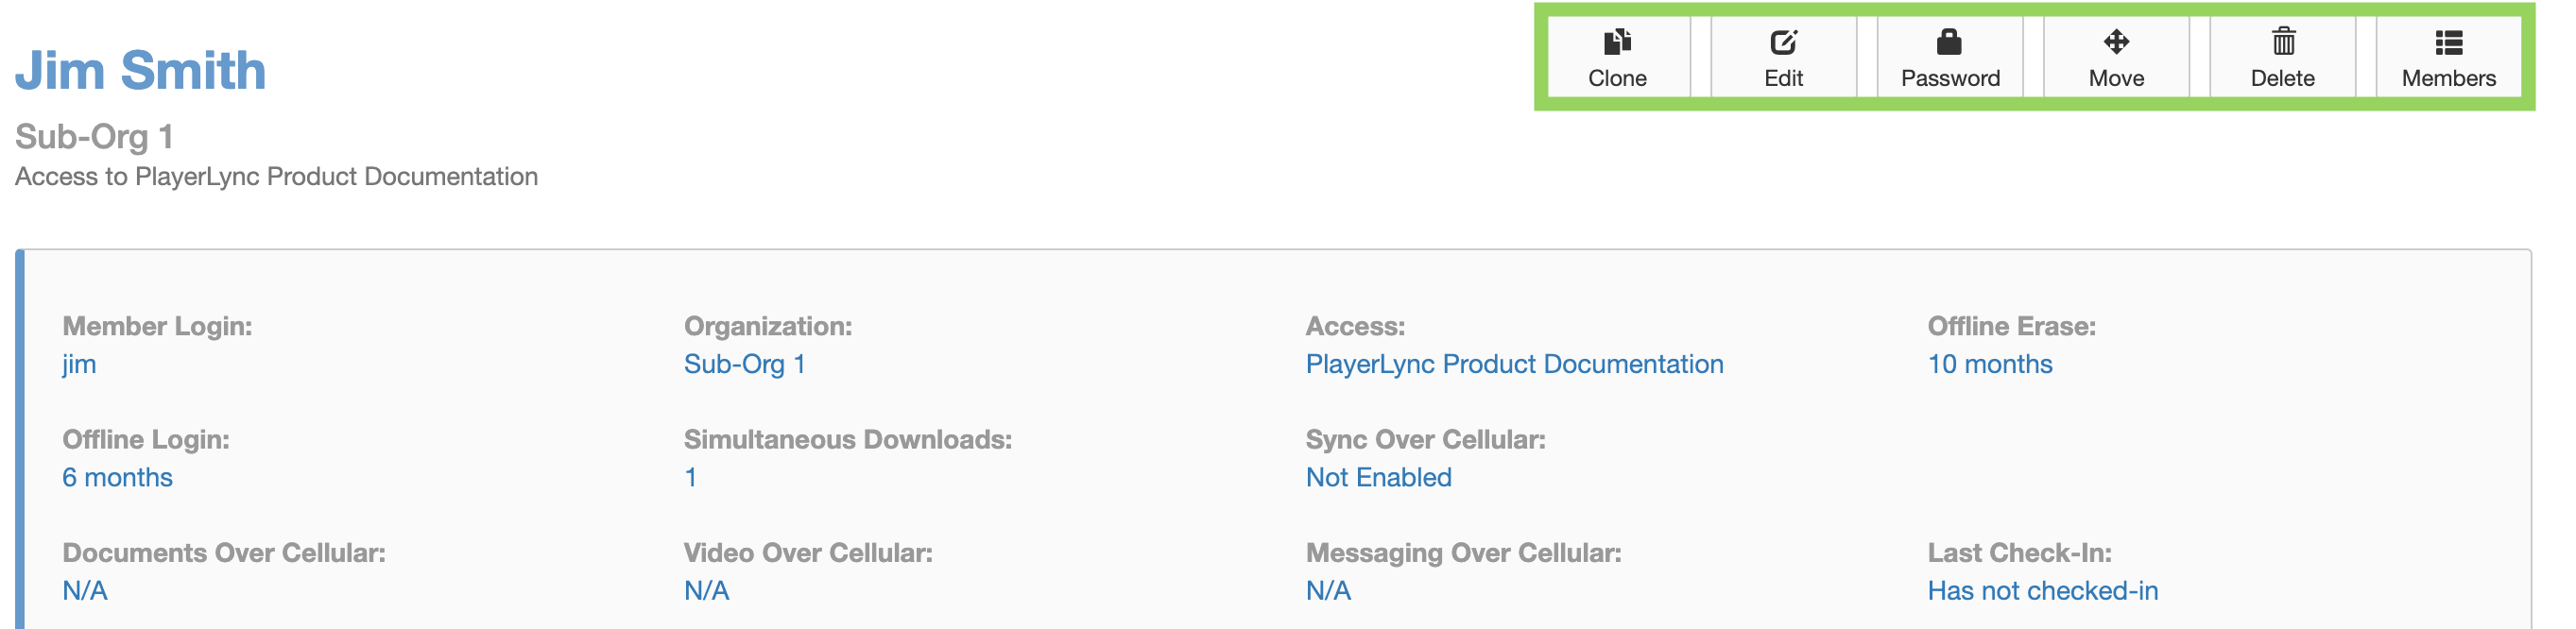
| Menu Item | Description |
|---|---|
| Clone | Clone the selected account making a new member with all the same defaults and group selections as the member you started with. You will only need to enter a few unique details to create the new member. |
| Edit | Adjust any aspect of the member account. Note that the Member Login (username) cannot be altered once set. |
| Password | Use this button to reset the password for the member. |
| Move | Move the member to another organization level. You will be guided through how to choose a new organization level for the member. |
| Delete | Use this button to delete the member account. If you have deleted a member and wish to bring them back, use the Trash button on the main Members list view to locate and undelete the member. |
| Members | This will take you back to the main Members list view. |
RESTORING MEMBERS
If you have deleted a member account by accident or wish to restore a member account deleted by another admin, you can do t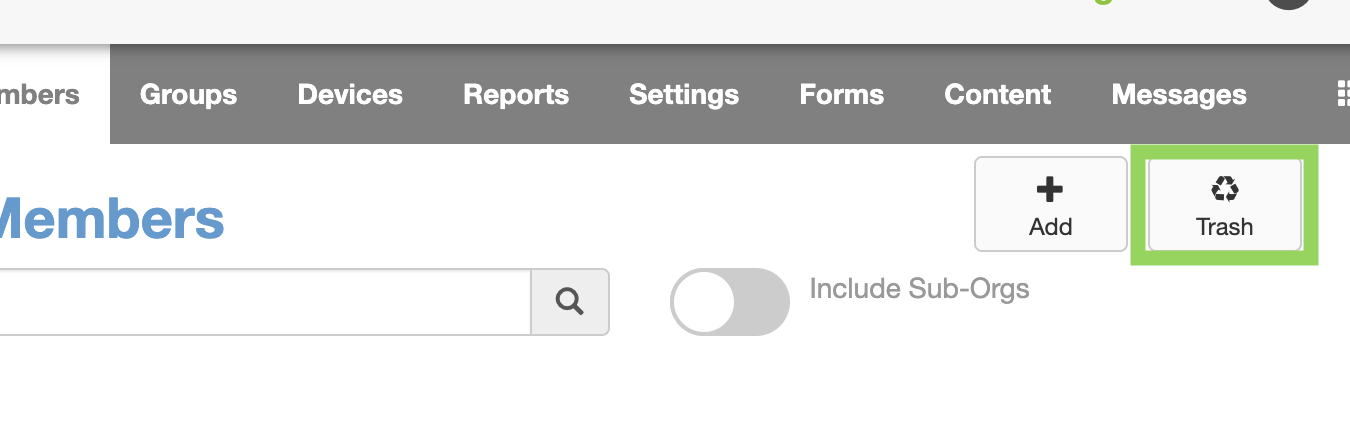 his from the Members tab.
1. Make sure to select the organization from the Org Tree on the left side of the screen, then navigate to the Members tab.
2. Click the Trash icon then select the account you wish to restore.
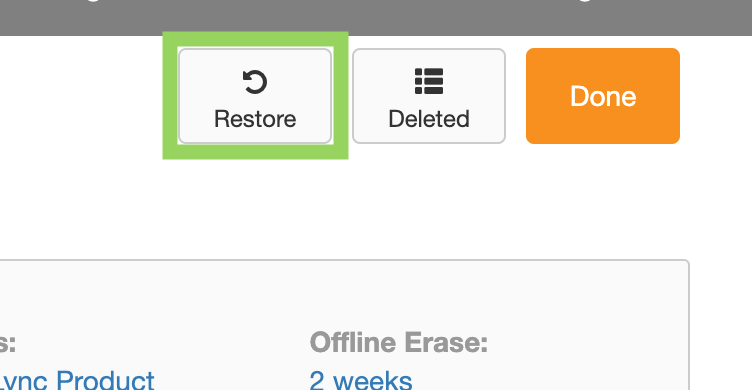
3. Click the Restore button to bring the Member account back to an Active status.
Note:
- Members that are in the Trash do not count against your PlayerLync license count. If you are unable to find the account you wish to restore, make sure if you are on the Primary Org where that member lived.
On this page