PlayerLync Azure SSO Steps

Written by Ryan Schwarzkopf
Updated at November 15th, 2021
PLAYERLYNC SSO STEPS - MICROSOFT AZURE
The following steps will guide you through setting up Single Sign On with Microsoft Azure and your PlayerLync environment.
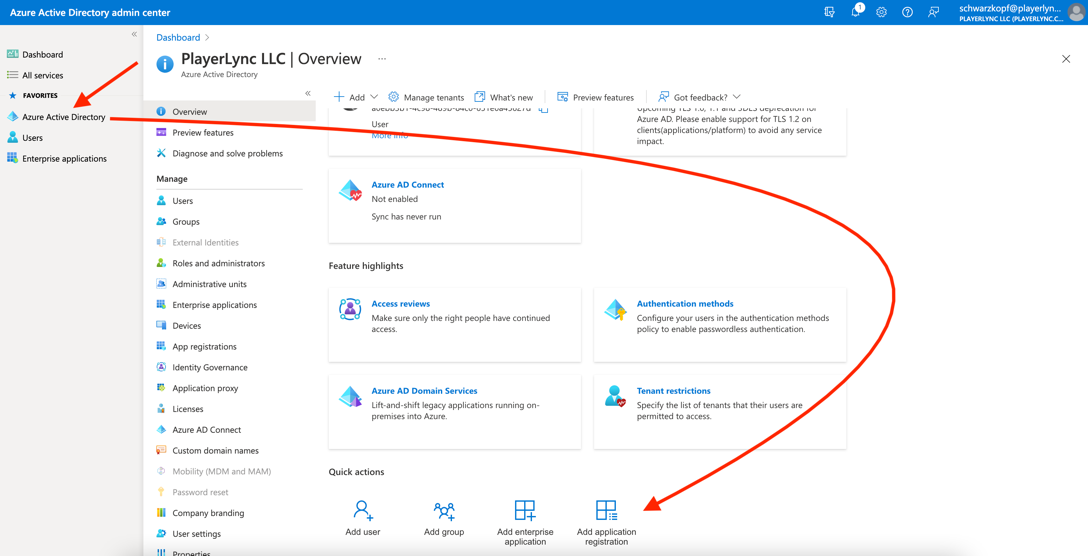
1. ADDING APPLICATION REGISTRATION
1. Login: https://aad.portal.azure.com/
2. Click on “Azure Active Directory” in the upper left of your console
3. Scroll down on the right window pane until you see “Add Application Registration"
 Delete
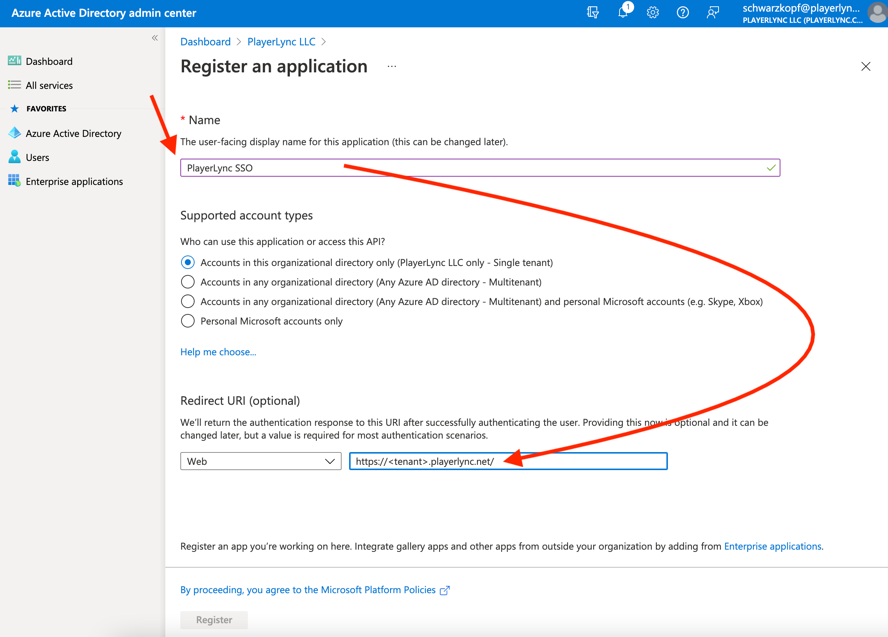
2. REGISTER AN APPLICATION
1. Name your application. We recommend “PlayerLync SSO”. This can be changed later if needed.
2. Fill in the Redirect URI with your PlayerLync’s server URL. This would be provided by your Account Executive or your CSM during Training. (e.g. https://<tenant>.playerlync.net)
3. Hit "Register"
 Delete
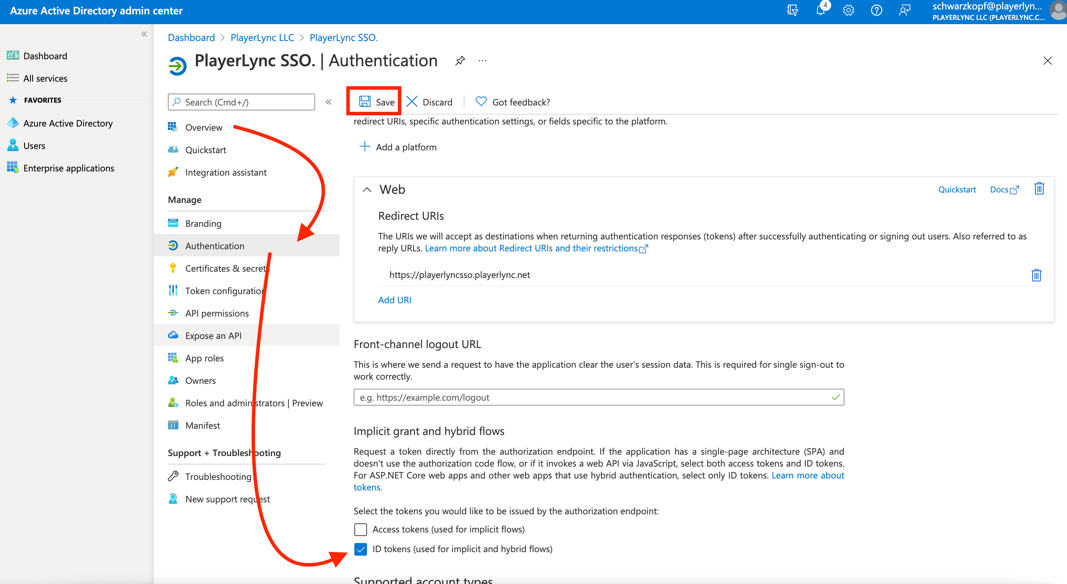
3. PLAYERLYNC SSO > AUTHENTICATION
1. After Registering your Application, you will be dropped on the Dashboard Overview page.
2. Click on “Authentication”
3. Scroll down and check the box for “ID tokens (used for implicit and hybrid flows)
4. Click “Save”
 Delete
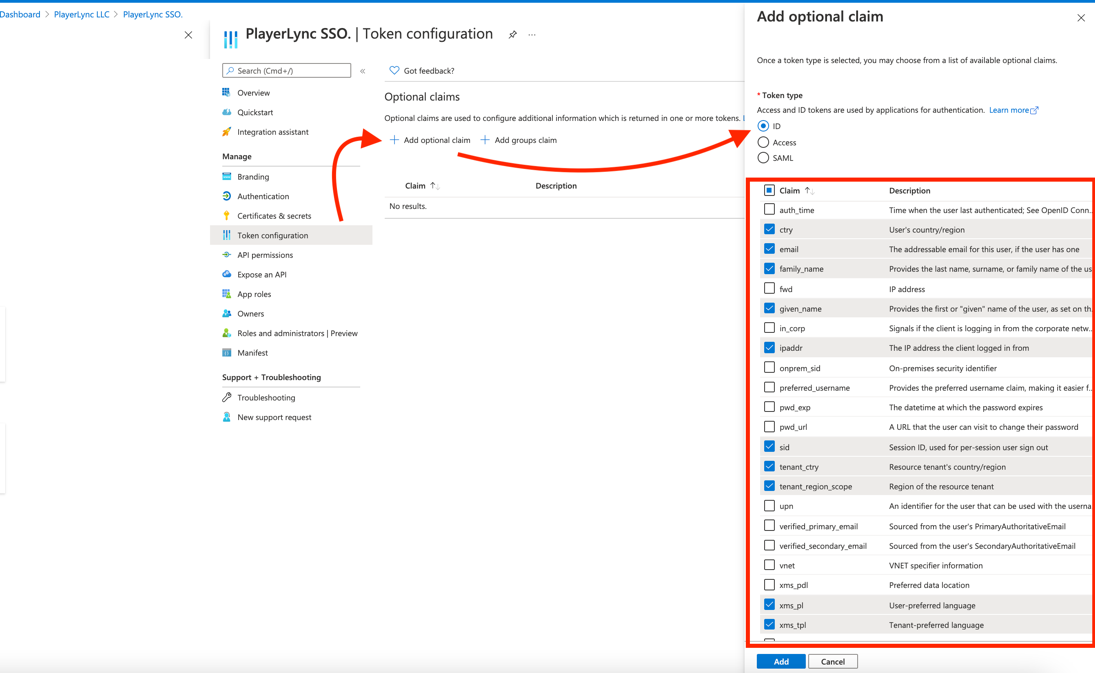
4. TOKEN CONFIGURATION
1. While still on your Application’s dashboard click “Token configuration”
2. + Add optional claim
3. Select “ID”
4. Check the listed boxes below and hit “Add”
 Delete
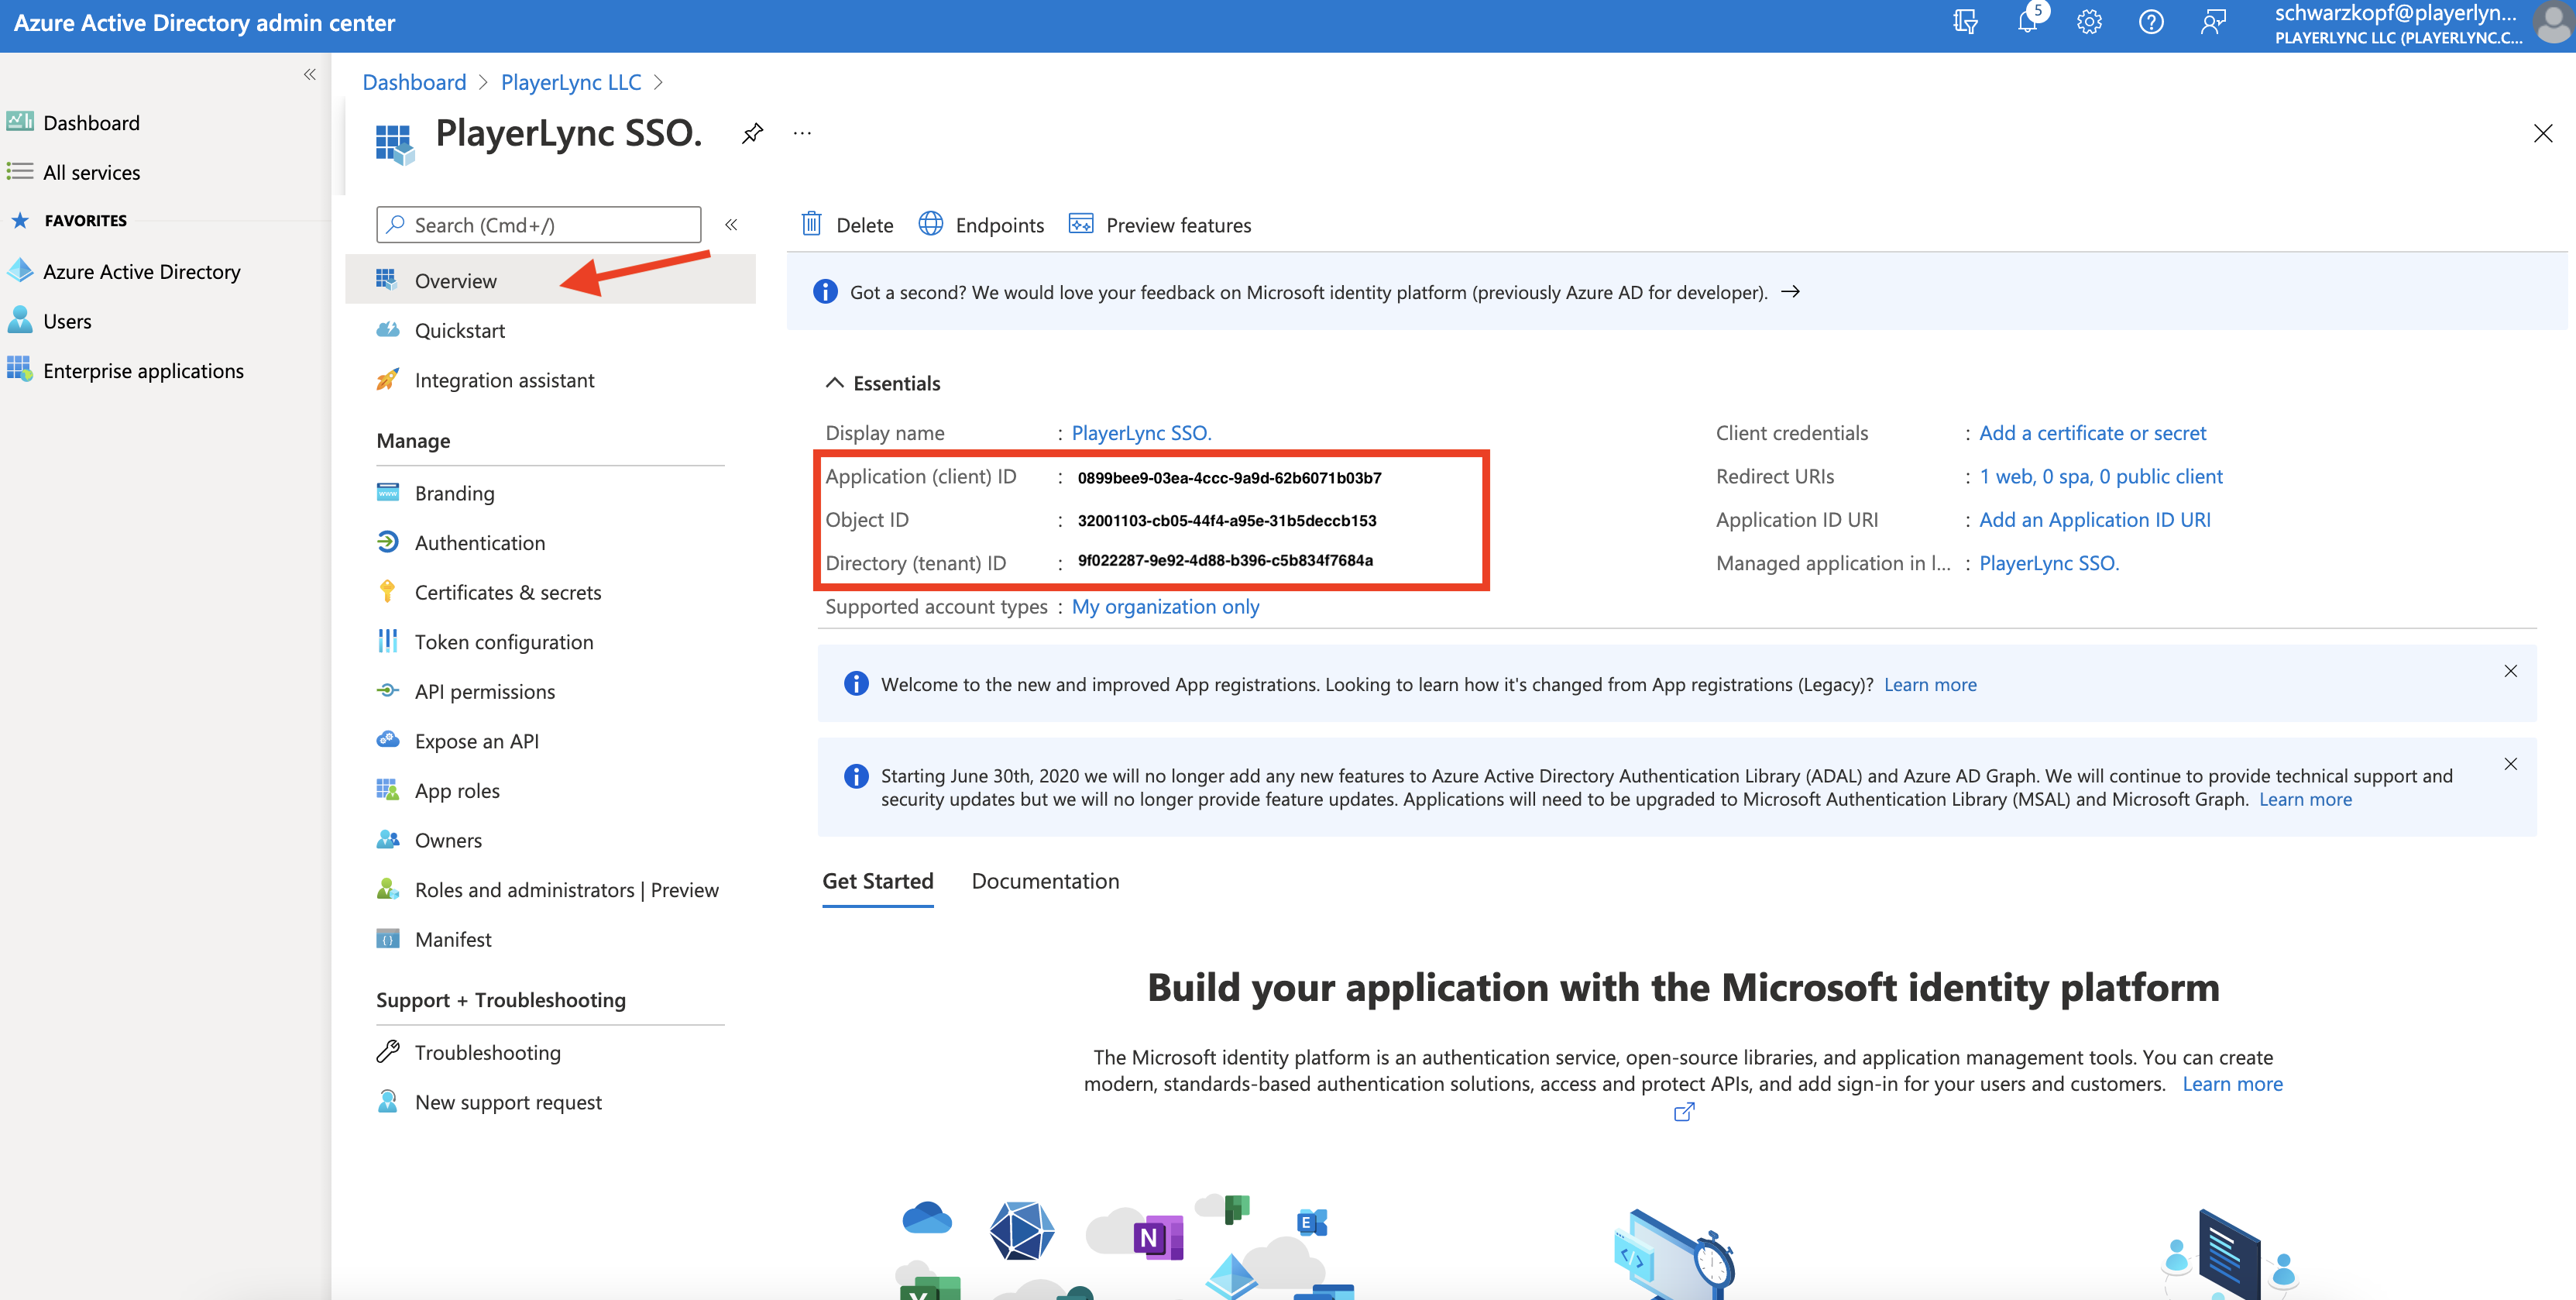
5. INFORMATION TO SEND TO PLAYERLYNC
1. Click "Overview"
2. Send the listed items to your PlayerLync Technical contact (Usually your Solutions Engineer)
a. Application (client) ID
b. Object ID
c. Directory (tenant) ID
 Delete
On this page