Admin - Publishing - File & Folder Properties

Written by Drew Holliday
Updated at August 9th, 2023
FILE & FOLDER PROPERTIES
Every file and folder in the Publishing area have properties that can be adjusted. These properties help with things like tagging or publish and delete scheduling.
ACCESSING PROPERTIES
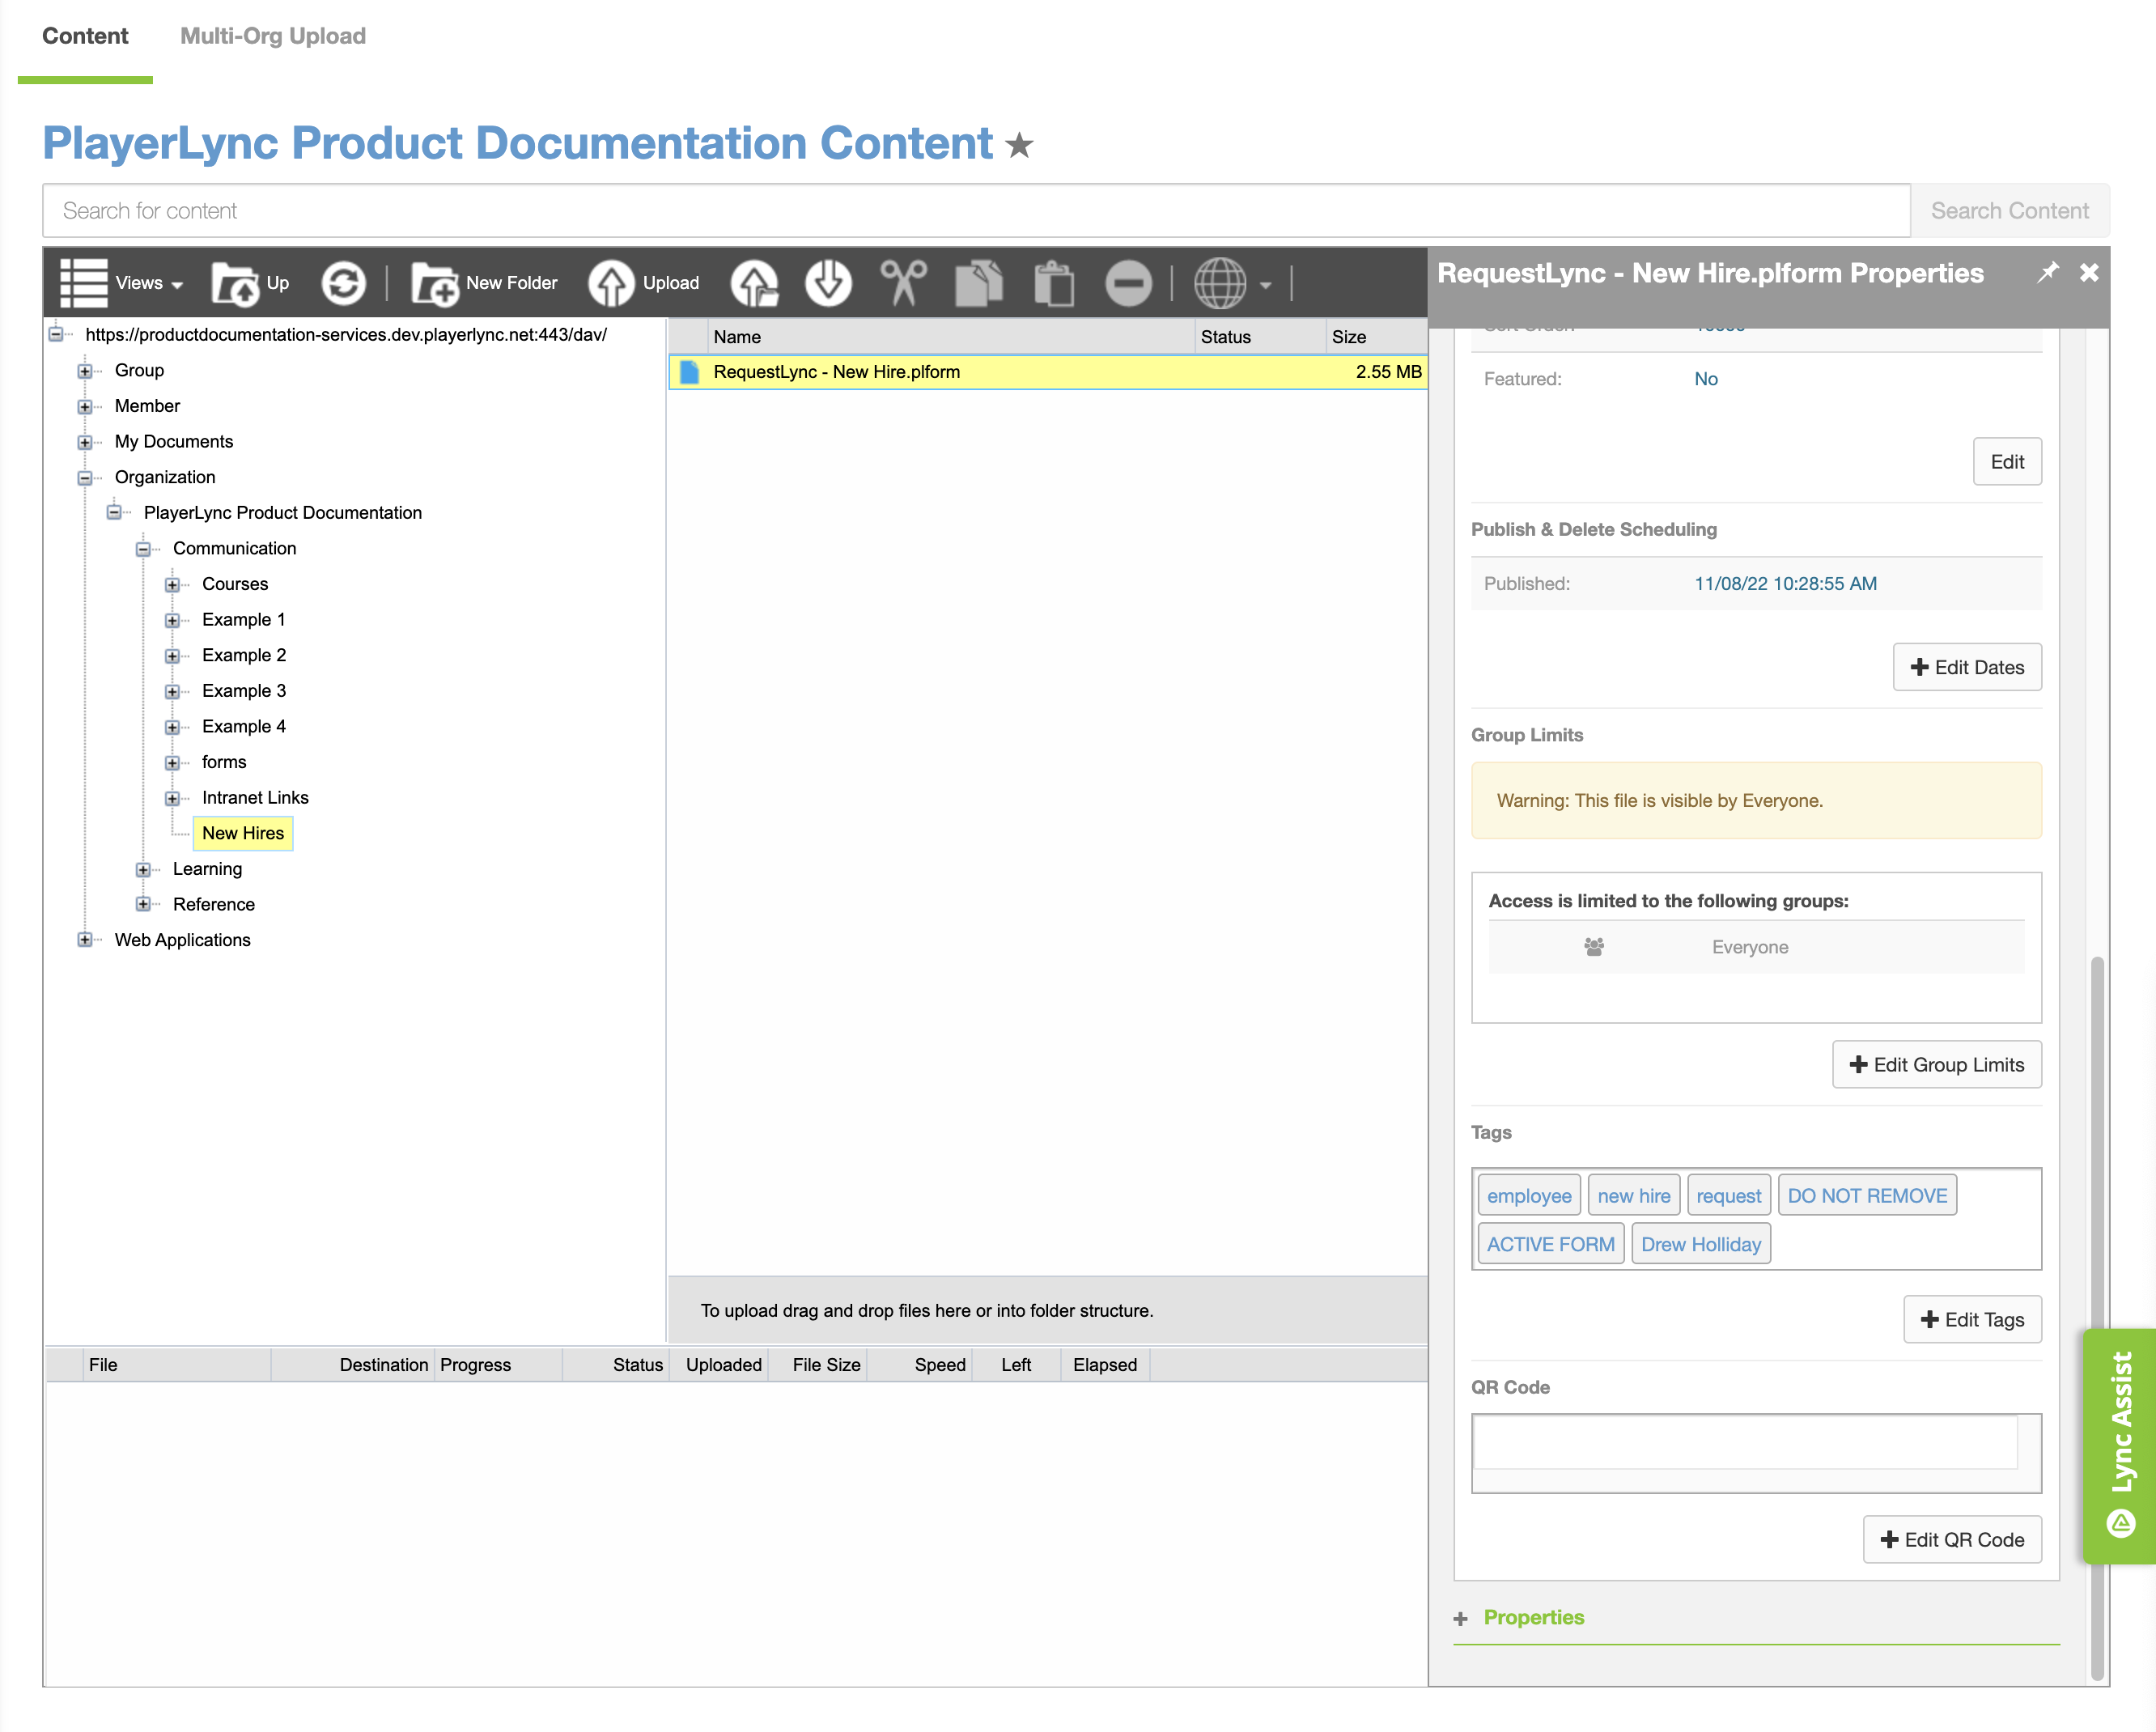
From the publishing area, right-click on any file or folder to launch the properties pop-out window.
If your organization uses the styled version of PlayerLync...
- You can assign images to each piece of content to spruce up the look and feel of the app for your end-users. Adding an image is simple and is accomplished through the File properties window for each content item.
- You can feature or assign content to show at the top of the app in a defined sort order. Featuring content not only provides a way to make the content stand out, but also provides a way to add additional context around the content using Feature Description and Feature Title.
Note: Any properties set on a folder (such as delete date) will also be applied to any subsequent files you add to that folder. Files will take on parent properties of the folder where they reside. You can break the parent/child relationship of properties by editing the properties of a specific file after you have uploaded it to that folder. Other files in that same folder will not be affected and will still retain the parent properties of the folder
HOW TO FEATURE CONTENT AND ASSIGN A CONTENT IMAGE
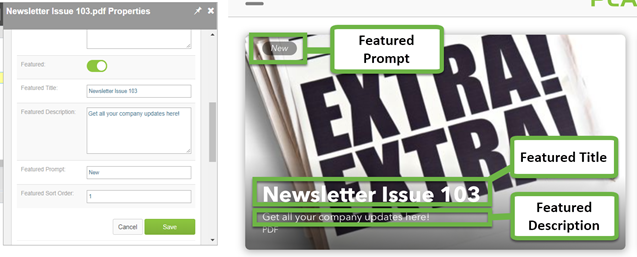
- Right-click on a piece of content to select properties
- Click EDIT IMAGE to add an image to the face of the content
- Next, click EDIT below the "feature" section
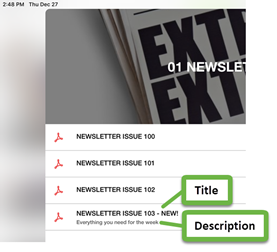
- Adding a title and description here will provide those details on the content tile in the app
- Adding a title and description here will provide those details on the content tile in the app
- Next, toggle the Featured option to expose those variables
- Adding a title and description here will provide those details on the content tile at the top of the app screen in the Featured Content area
- Adding a title and description here will provide those details on the content tile at the top of the app screen in the Featured Content area
- Adjust sort orders as needed
SETTING UP PUBLISH AND DELETE DATES
Setting dates here will help you publish content to your audience on a planned delivery and removal schedule. Publish the files, add dates/times and forget about it. The files will go away when that date/time comes to fruition. You can also apply dates/times to folders. All files in the folder will respect the property set on the parent folder. Any subsequent file you drop in that folder after setting the date/time will also take on that property.
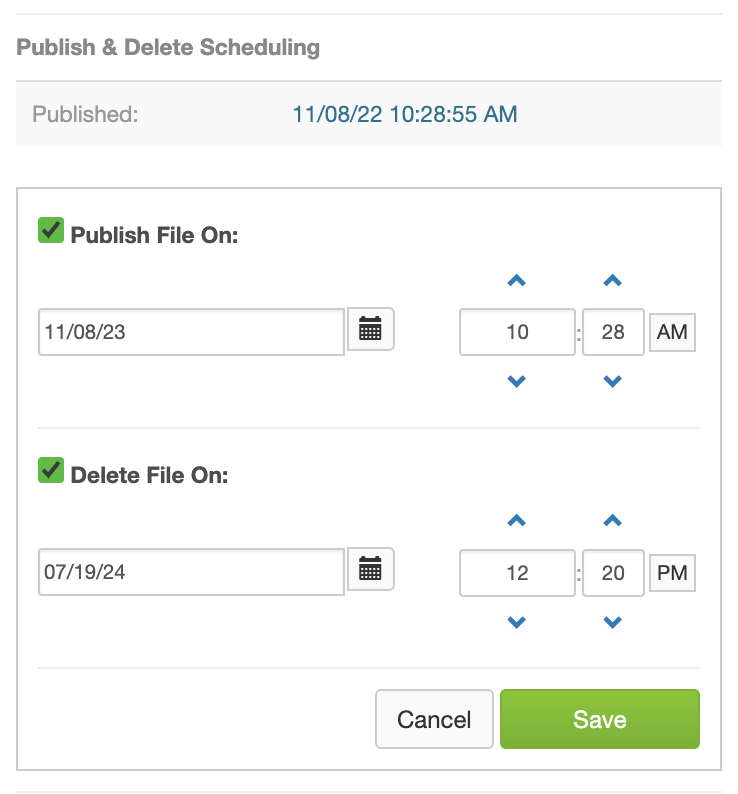
If you want your folders/files to be available for a set period of time:
- Right-click on a piece of content to select properties
- Scroll down to the Publish & Delete section and click edit
- Set your dates/times then click save
SETTING UP GROUP ACCESS LIMITS
By default, all content published at the org level can be viewed by all members in the organization by way of the Everyone group. This is a system function and can only be removed when other Group Limits have been applied. Applying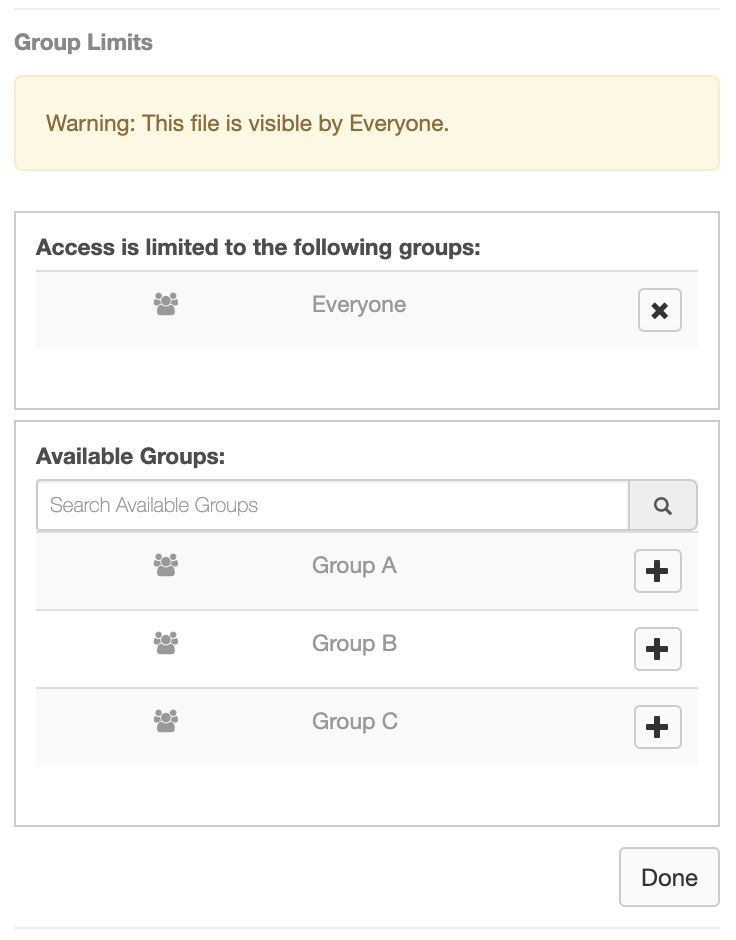 limits at the org level (Note: Group Limits only work for publishing at the org level) means all content will still go to all devices, though the content will only be visible to members of the assigned group when they login to the app. You can assign more than one group to the content with this feature.
- Right-click on a piece of content to select properties
- Scroll to the Group Limits section and click edit
- Use the + button to add group access from the Available Groups area. Use the x button to remove a group. Note: Once you've added other Groups you can remove the Everyone group.
- Click done to save your selections
Reminder: The PlayerLync application does not download empty folders. This is helpful because it allows you to create your folder structure and set the group limits, then add files.
When members search in the app for content using the search box, there are a few values that are searched and return results... File name, any description or title added to the file properties section, and tags.
When members begin typing in the search box, content will filter in real-time, revealing content. 
Tags are a way to add keywords to a piece of content without altering the content itself.
- Right-click on a piece of content to select properties
- Scroll to the Tags section and click edit
- Enter each tag word or phrase, hitting enter in between each entry
- Click done
Note: Content tags are only available for files. They are not available for folders.
On this page